Basic Sewing Pattern Adjustments
Category: Tutorials 31 May 21
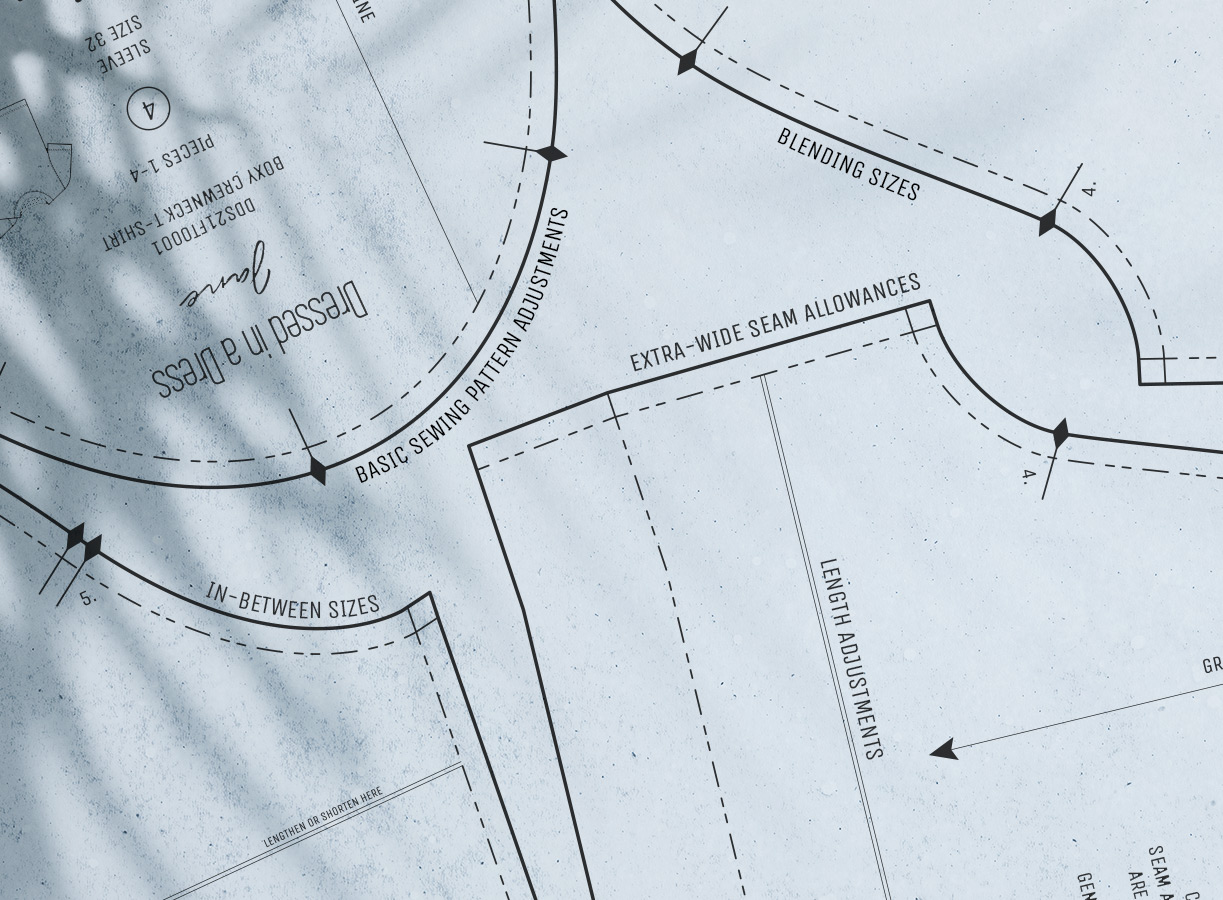
This tutorial is a complementary post for Jane: Boxy Crewneck T-shirt pattern which I currently release for free.
We all are different, and we all are beautiful. So alike in a general overview, but entirely different in details. Every feature in us makes us unique. This uniqueness means there is no single size chart or pattern that will perfectly fit everyone. And it’s okay because by choosing the closest suitable size and making a couple of adjustments to a standard pattern, you can get that desired fit.
There are numbers of various adjustments possible, and you can find pretty intriguing books on this matter, but the most common manipulations are not that complicated to require specific literature.
- For example, if your bust, waist or hips measurements belong to different sizes, you can blend two sizes of an existing pattern for a better fit.
- If your measurements fall right between two brand sizes, you can make an in-between size.
- If your back waist, waist to hip and sleeve length measurements are different from the standard ones, you can adjust your pattern length.
- To allow for maximum adjustments, add extra-wide seam allowances of your choice wherever you suspect you might need extra space.
Let’s take a more in-depth look at how to perform these options.
In-between Size
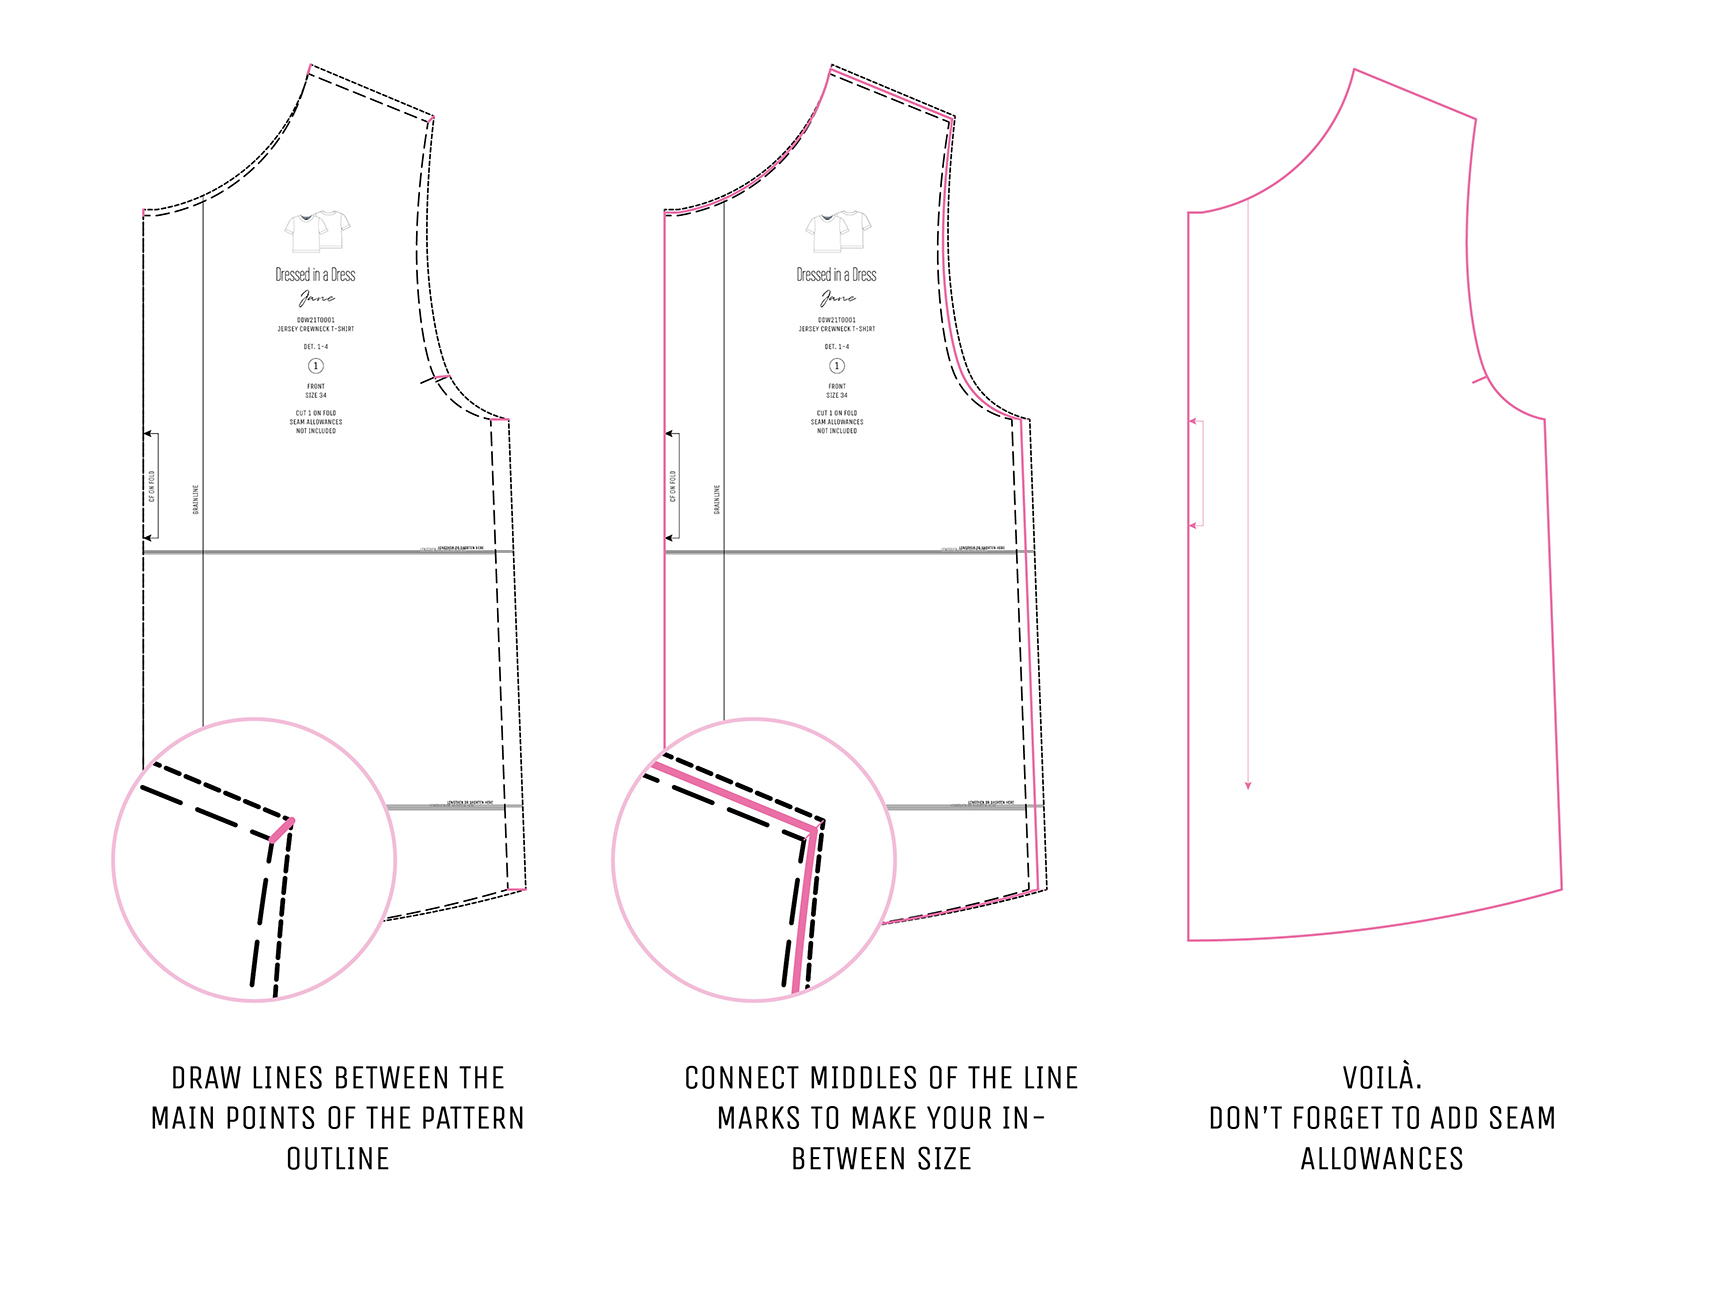
- Choose two sizes between which you are going to draw your new size. Print those sizes without seam allowances.
For example, if your measurements fall between sizes 32 and 34, your new size will be a size 33, if we may say so.
- Draw auxiliary lines between the pattern contours of the existing sizes. Take a ruler and draw these lines between the main points of the pattern outline: corners, notches and curve middle points. Next, measure the distance between two corresponding points and make a mark or a dot in the middle. Do this for all other lines you drew. Finally, connect all the dots to create your in-between size.
- Add seam allowances advised by the pattern, or you can choose your width. Repeat for other pattern pieces.
Blending sizes
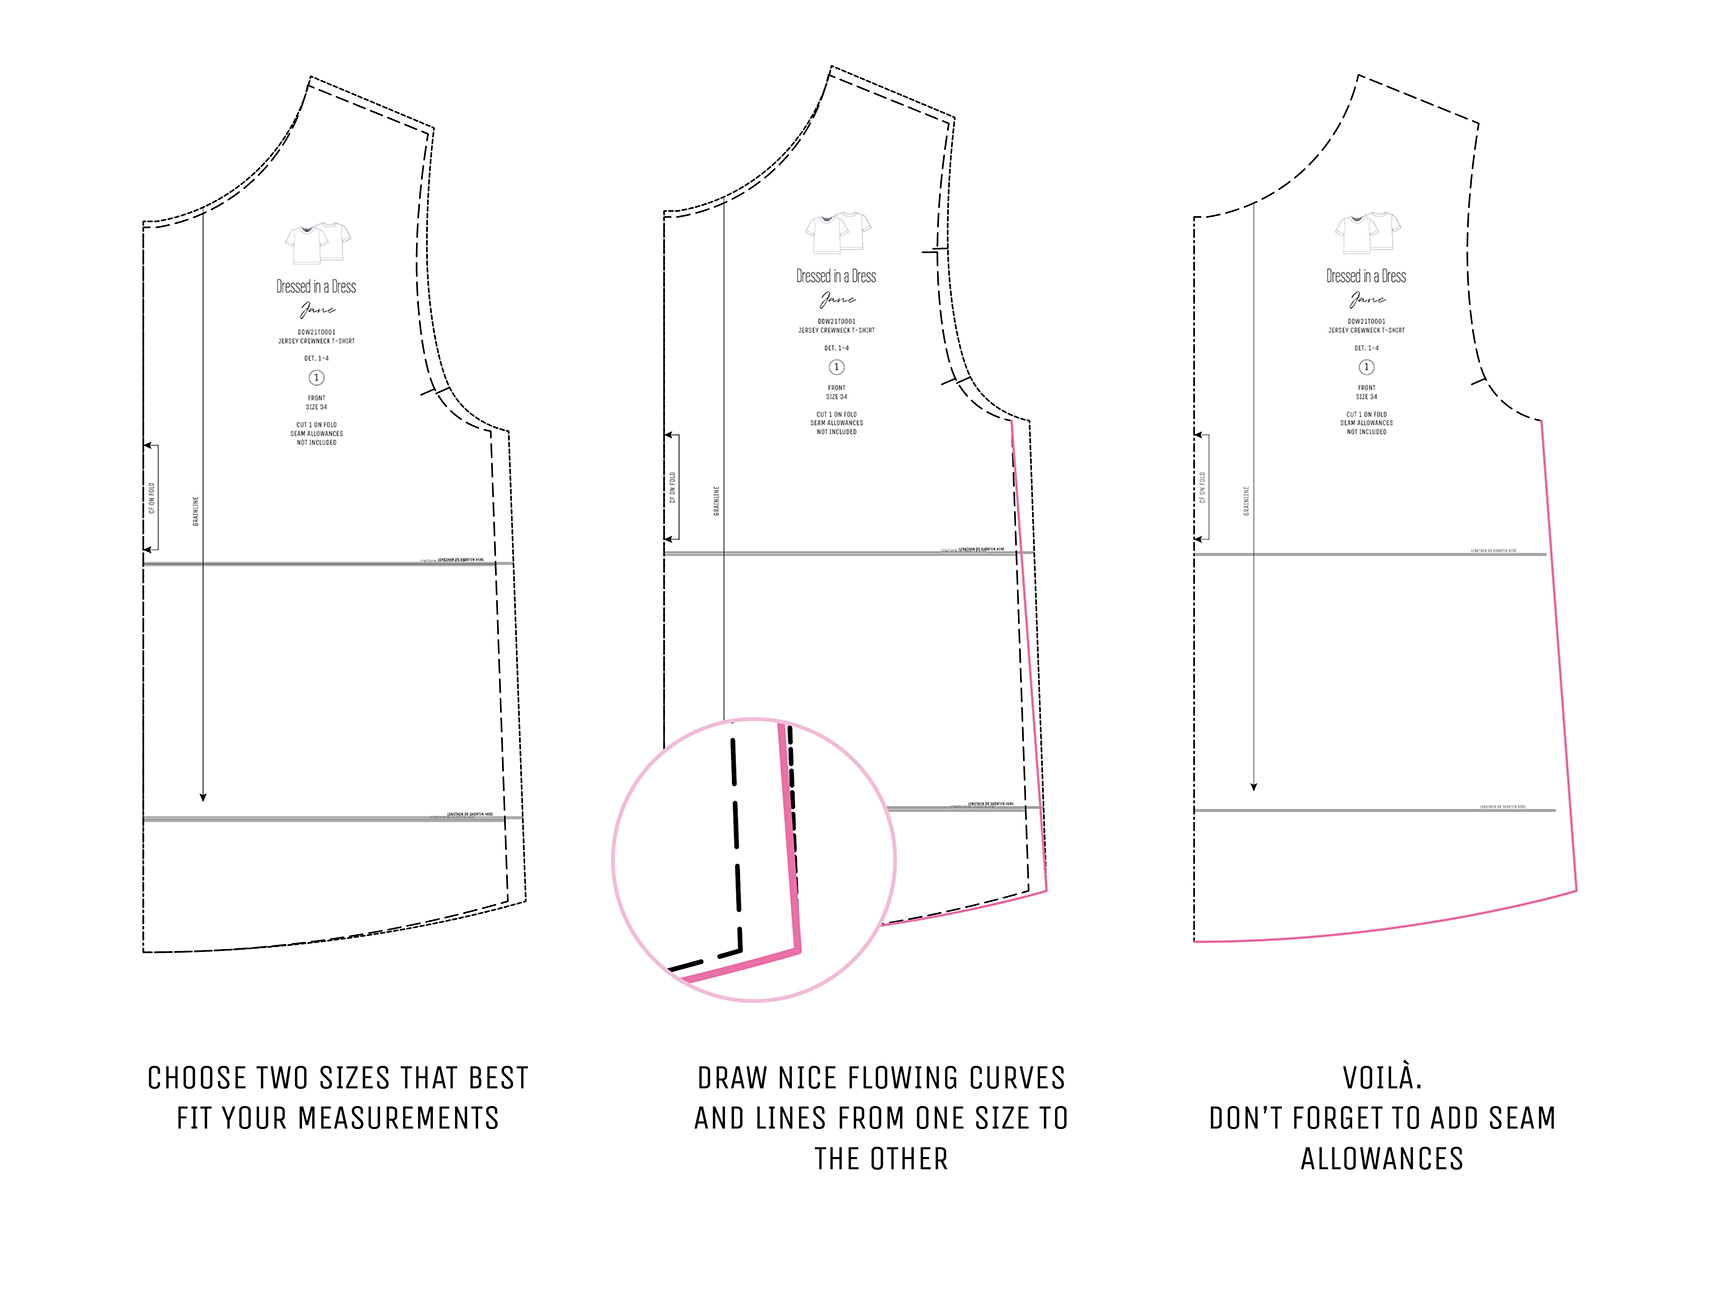
- Choose two sizes that best fit your measurements. The size that matches your bust measurements will be the main one. Print those sizes without seam allowances—this will prevent distortion of the lines and notches.
- Draw nice flowing curves and lines from one size to the other. Depending on your measurements, you might need to take only the waist or the bottom part of the different size, or you might need both. Make the same adjustments to both back and front pattern pieces.
- Add seam allowances advised by the pattern, or you can choose your width.
Length Adjustment
- Compare your back waist, waist to hip and sleeve length measurements with the corresponding measurements given for your pattern size. Also, compare the finished garment’s waist to hem measurement with the desired garment length of your own.
- Determine how much to adjust the pattern pieces and whether you need to lengthen or shorten them.
For example, the standard pattern has a 37 cm (14.6ʺ) back waist length—if your measurement is 39.5 cm (15.6ʺ), you’ll need to lengthen the pattern piece by 2.5 cm (1ʺ) in this area. And if your measurement is 34.5 cm (13.6ʺ), you’ll need to shorten the pattern by 2.5 cm (1ʺ).
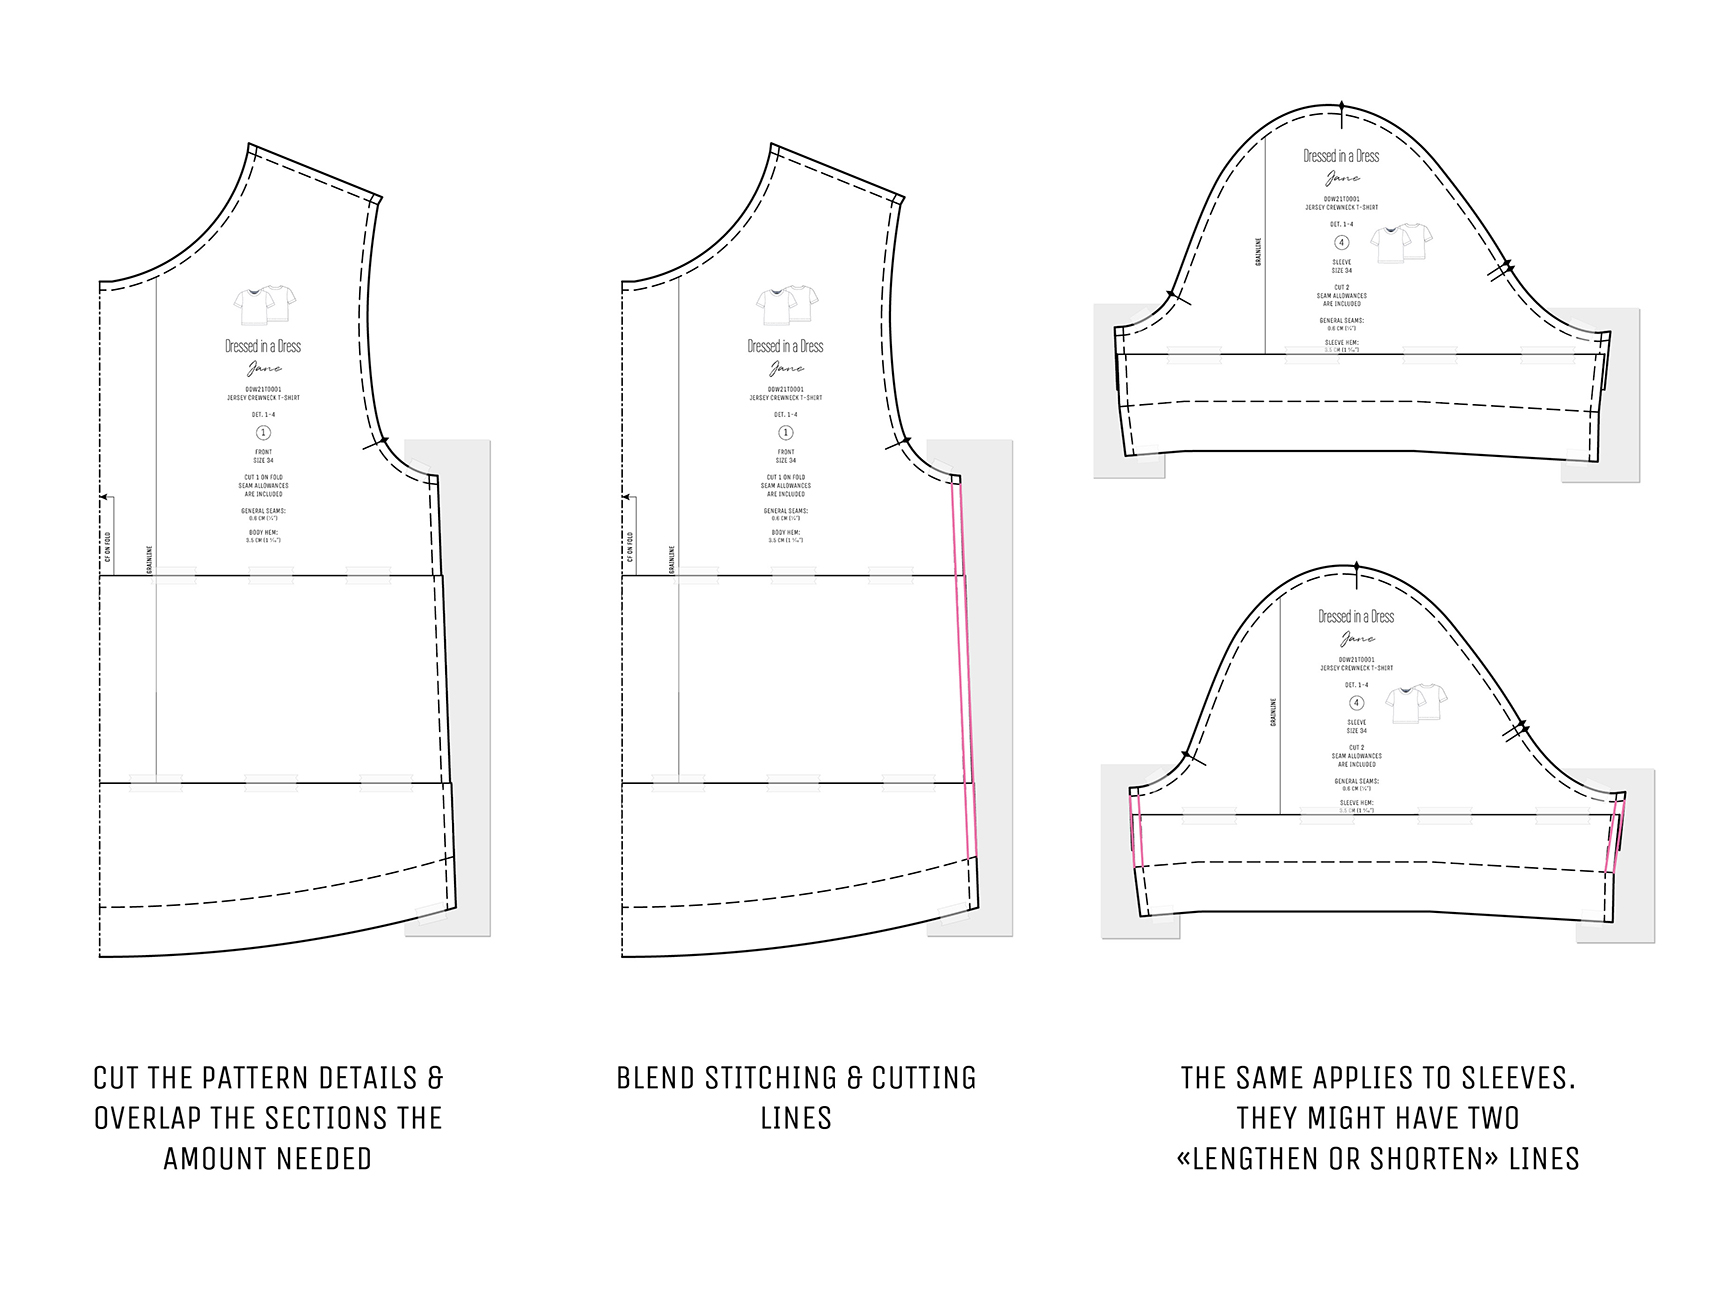
- Decide which area or areas need corrections and cut the pattern pieces on the printed adjustment lines. Usually, they are marked with a double line “Lengthen or Shorten Here” phrase.
- Print the pattern with seam allowances, cut the pattern details on the bottom of the double line and follow the directions below.
Please note that the examples show adjustments applied to every length measurement, while you may need to make only one or two of them.
Lengthen the Pattern
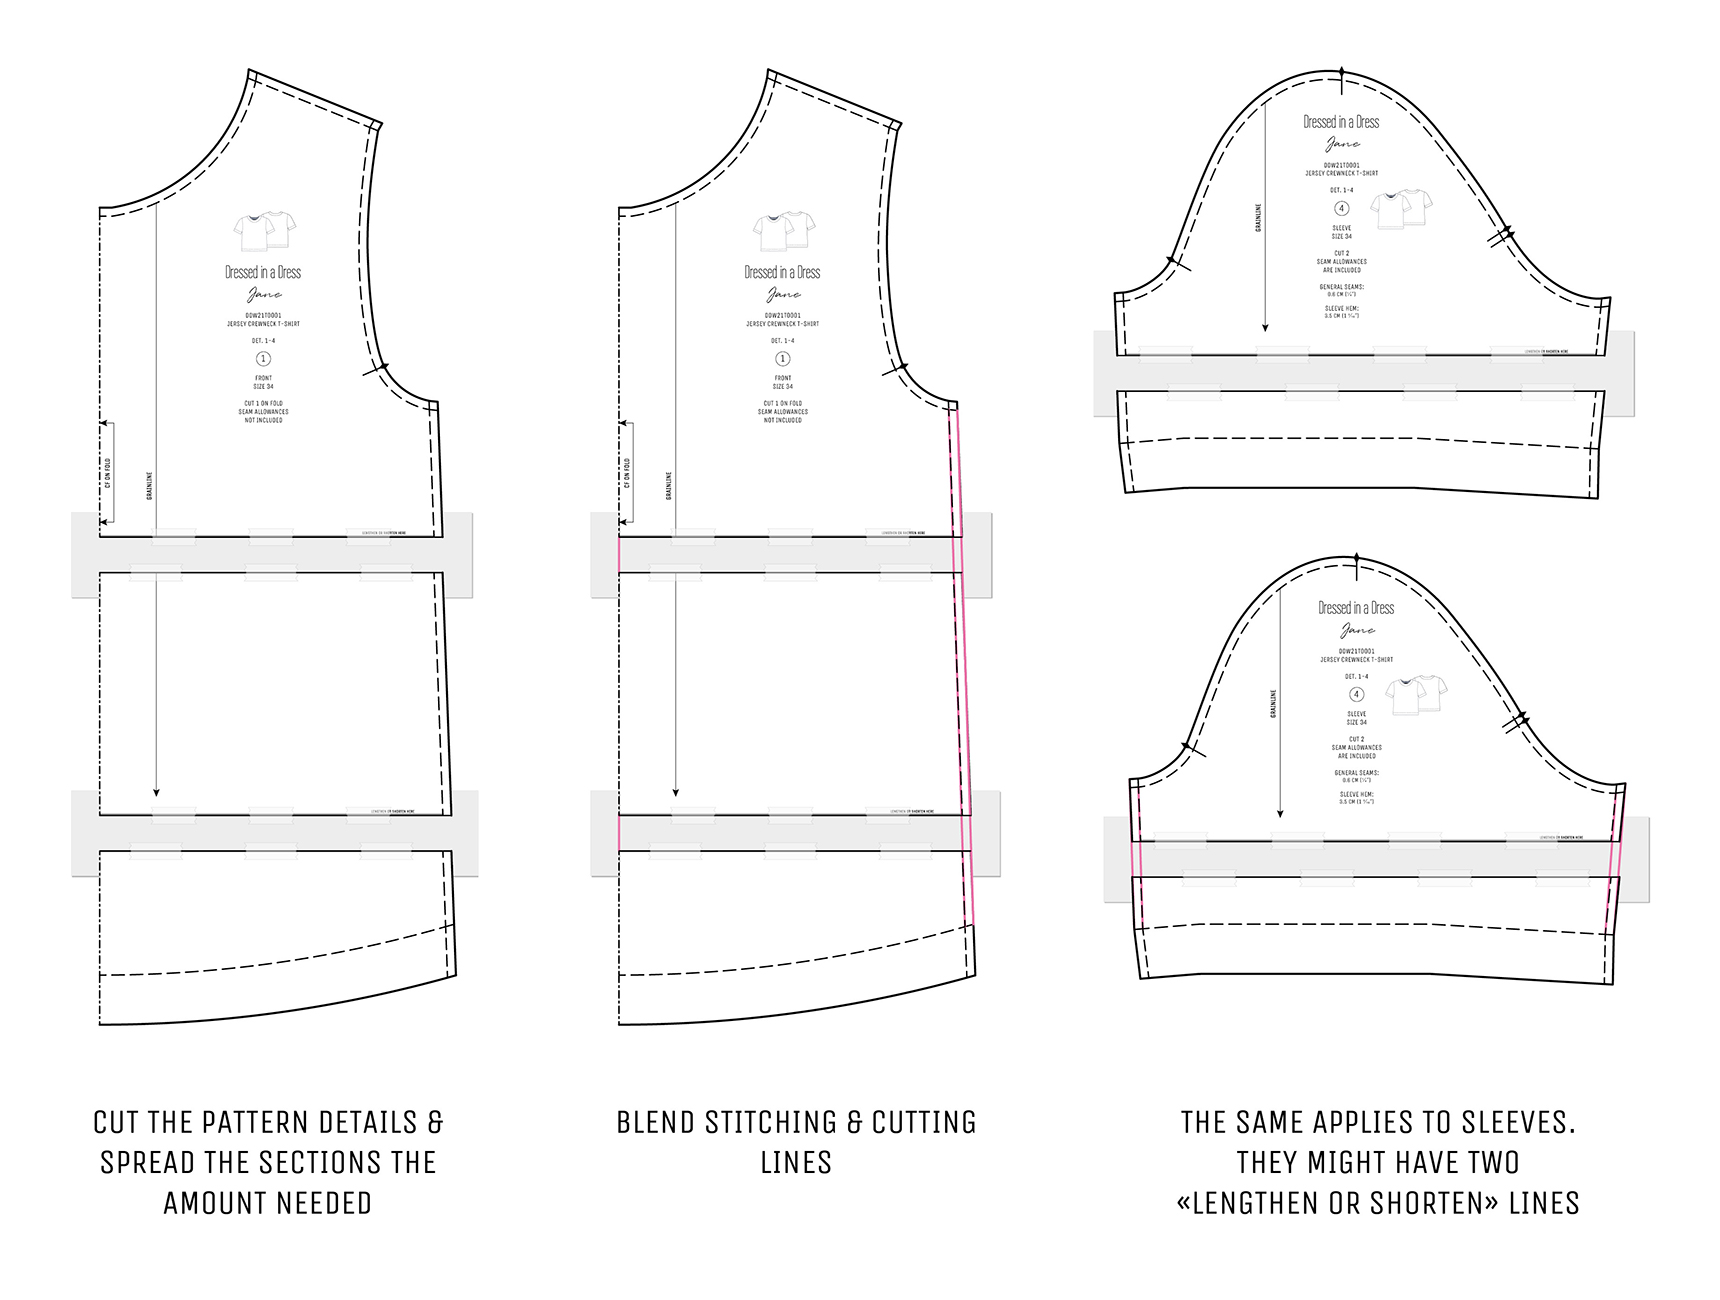
- Cut the patterns, as mentioned above.
- Spread the sections the amount needed. Place paper underneath the gaps and seamlines that you are going to change and tape sections in place. Double-check that the grainline is straight.
- Blend stitching and cutting lines by drawing smooth curves and lines.
Shorten the Pattern
- Cut the patterns, as mentioned above.
- Lap cut sections so that the overlap equals the total amount of centimetres the pattern must be shortened. Keep the grainline straight and tape the sections together.
- Blend stitching and cutting lines by drawing smooth curves and lines. You might need to tape paper underneath the pattern piece if the lines run outside.
Extra-wide Seam Allowances
- Print the pattern of your size with or without standard seam allowances. If only a few seams need new allowances, you might want to keep the original ones not to spend time redrawing them by hand later.
- Add your seam allowances in the areas wherever you feel you might need room for corrections. For example, you can add extra-wide seam allowances at the side, shoulder (up to 2.5 cm (1ʺ)) and armhole seams (up to 2 cm (3⁄4ʺ)) and at the hemline.
Please note that adjustments of the shoulder line will affect neckline pieces and also might affect the sleeve. To lengthen the garment, use length adjustment instead of extra-wide seam allowances.
Importance of a Toile
If you apply several changes to a complicated standard pattern, take some time to make a cheap fabric toile (or a test garment) to adjust and check the fit. For the toile, choose the cheap fabric with the same stretch percentage, drape, weight and overall behaviour as your fashion fabric.
xoxo,
Kaia

 My Etsy Store