What’s inside the fur coat? Part 2.
Category: Sewing Story 12 August 19
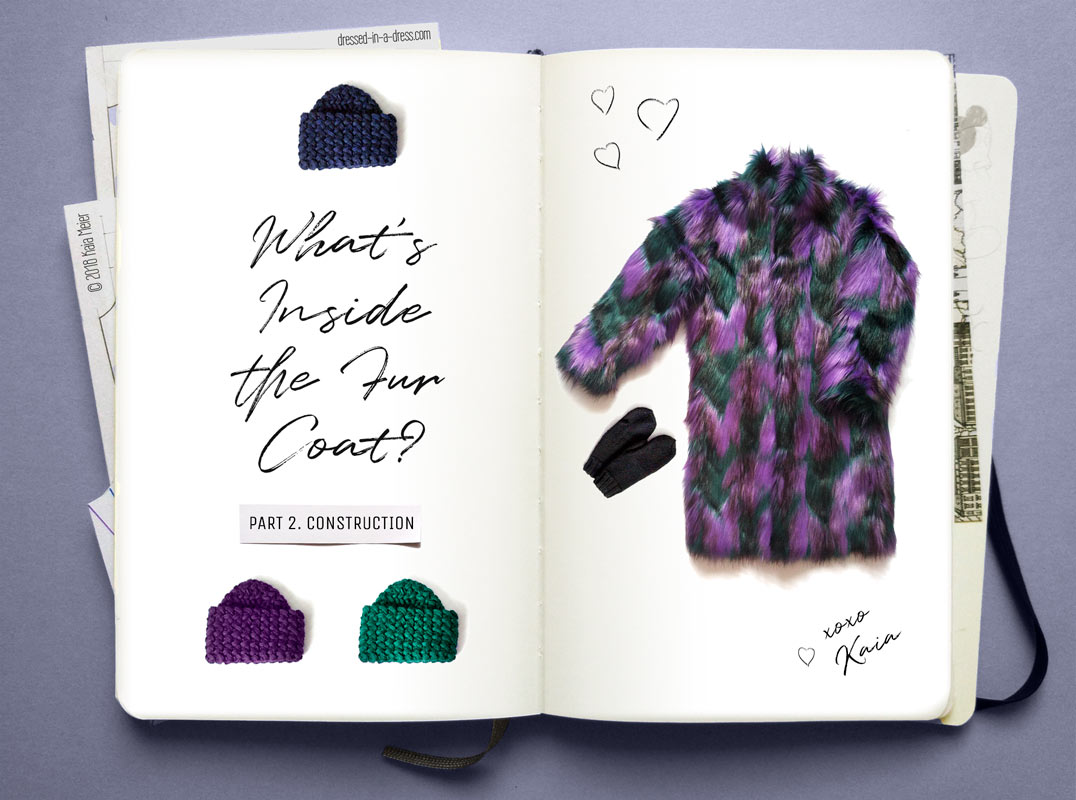
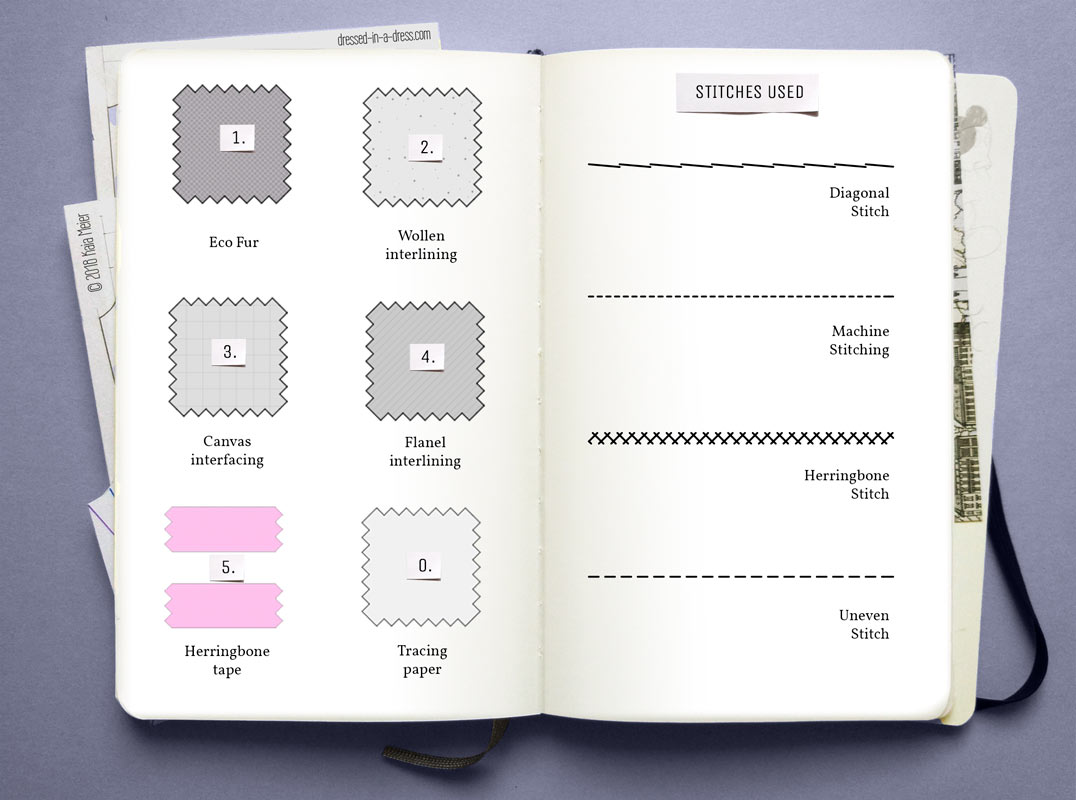
In the previous post I wrote about the difference between interfacing and interlining. There I described the fabrics and techniques I used to give this coat shape and support.
And now my hands are burning, because it’s time to draw a pattern for the inner structure.
The Interfacing Patterns
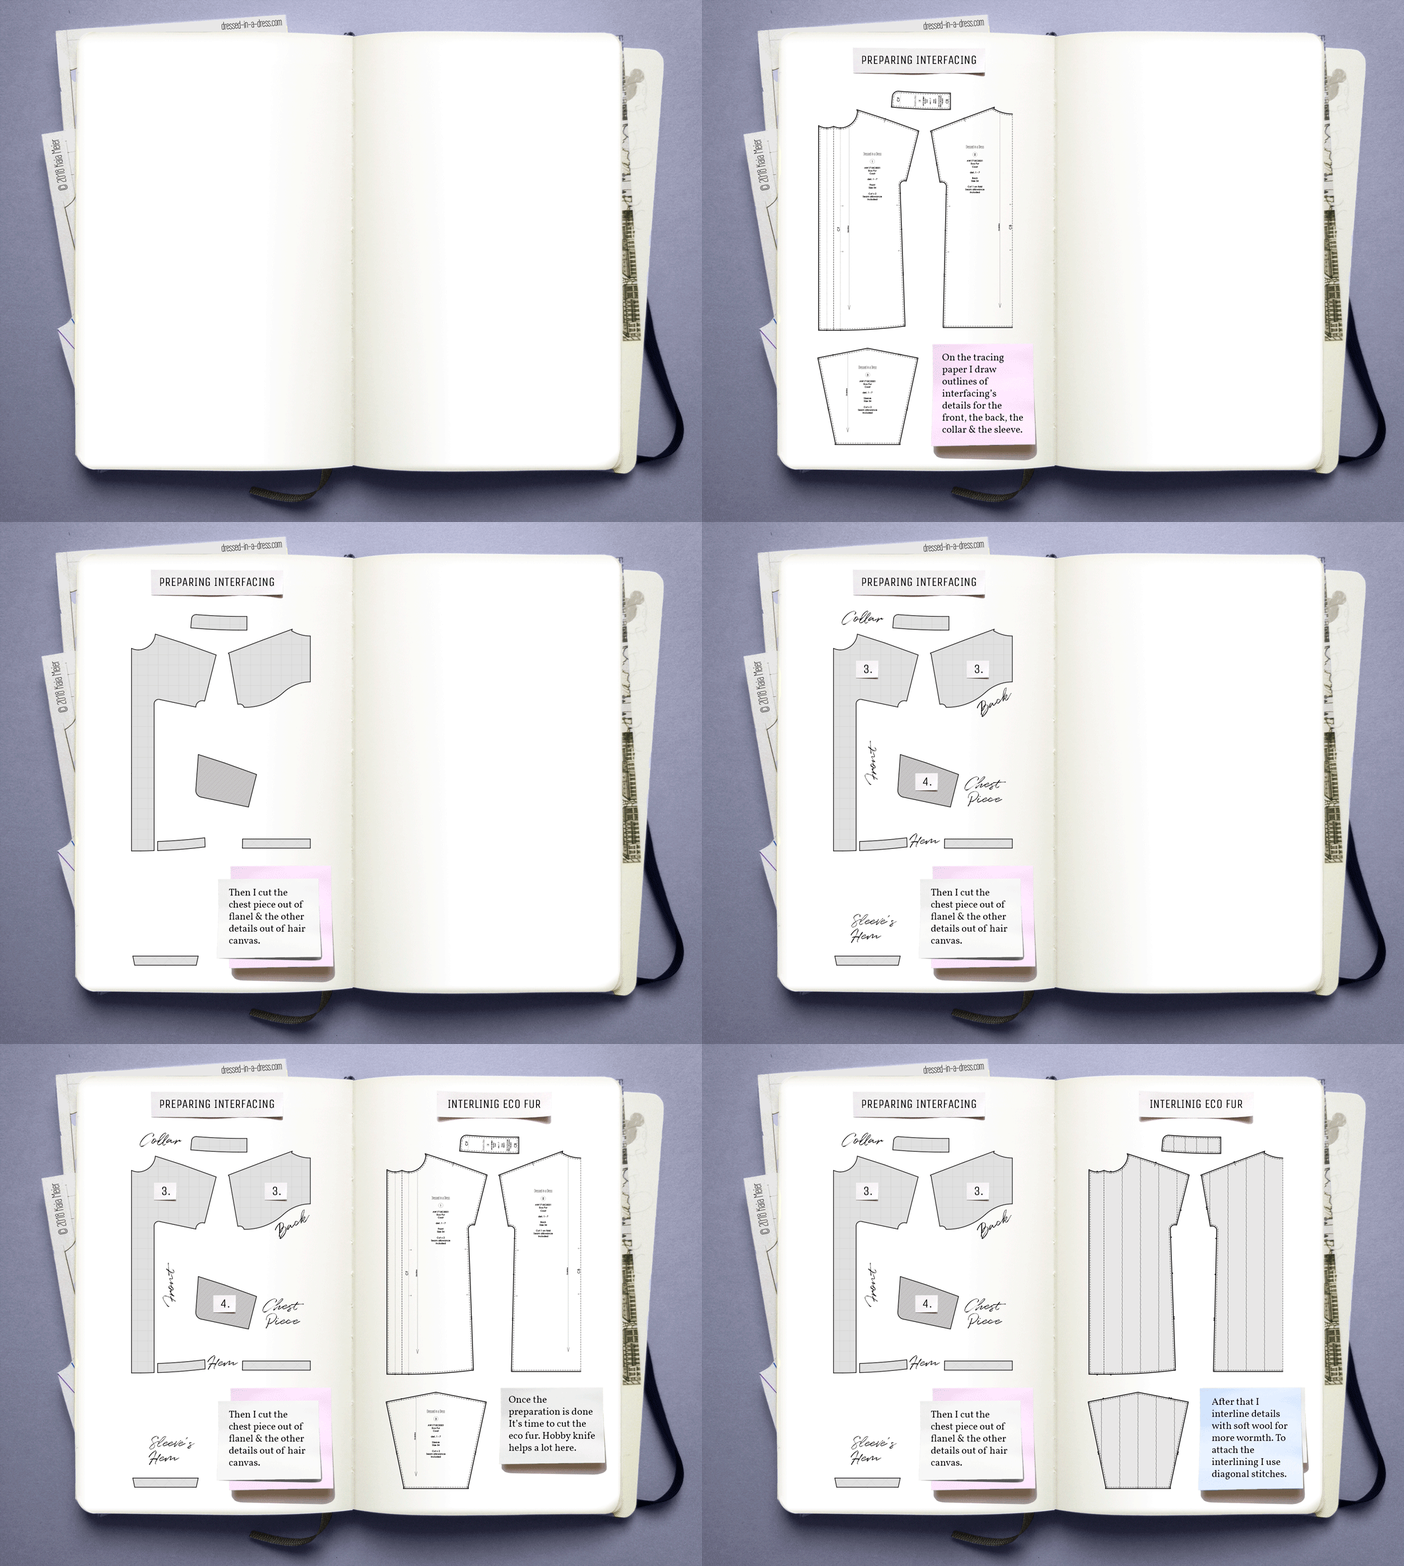
I do not print the details of the inner structure in advance, so I place tracing paper on top of the pattern and draw new contours.
The Canvas
I’m not going to interface the whole body of the coat, as I don’t want it to stand straight by itself, the fur’s base is already dense.
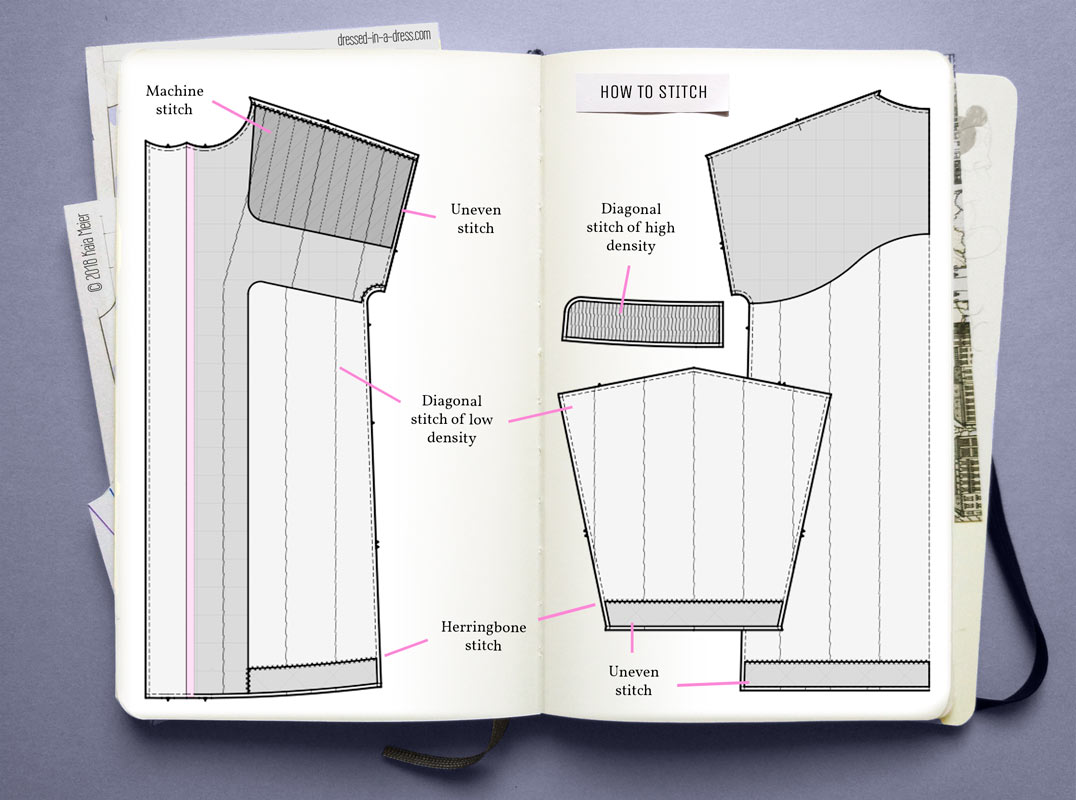
- The hair canvas details support the upper back, partially interface the front, strengthen the outer part of the collar and the hemline of the “body” and sleeves. The canvas is stitched to the shell details with diagonal and herringbone stitches.
- At the front, the contour of the hair canvas steps 7–10 cm away from front facing fold line. Then it goes 2.5 cm under the bust highest point and gradually descends to the side seam.
- At the top, the interfacing follows stitching lines of the armhole and the neckline. At the shoulder and the side stitching lines it steps 3 mm away to avoid stiffness.
Big shoulders are in fashion, but I do not want to look like a shaggy bedside table.
- On the back, I draw the curve of the canvas interfacing 21-24 cm below the neckline, and on the side, I smoothly connect it to the front interfacing detail.
- For the collar, I copy its detail without seam allowances. You can leave them and cut them away later if the material falls off quickly, and it does. I will learn this later, of course.
- To strengthen the hemline of the “body” and sleeves, I cut out a canvas strip 4 cm in width. I cut it on the bias, along 45* grain. Placing the grainline like this will make the canvas fluid, but still, the hemline will keep its shape.
The Shoulder Pad
On the other sheet of tracing paper, I draw contours of the shoulder pad. I step 3 mm away from the neckline, the shoulder seam and the armhole. Then at the level of 2/3 of armhole’s height, I draw a perpendicular line to it and round it to the neckline.
The flannel shoulder pad softens the junction of the shoulder and the bust. I attached the pad to the canvas with machine stitches.
For greater plasticity, it is better to cut this part on a bias, and not as shown in the photograph. The bright blue flannel shows my mistake with no mercy.
The Interlining
The patterns are now officially ready, and I proceed to the exciting stage, the cutting. It’s not difficult to cut fur with the right tools, all you need is patience and a band-aid. A cut on the finger does not spoil my mood, because soon the world will see a new fur coat. On the back of my mind, I wonder if I would be considered “local” by the inhabitants of Sesame Street.
Then I cut out the same details from woollen interlining. Instead of paper patterns, I use fur details. Around every piece, I leave a bit of space, because details reduce in size after stitching. This, according to Murphy’s law, happens in the most unsuitable places.
To ensure that the wool stays in place between the lining and the fur, I stitch it to the main details with vertical rows of long diagonal stitches. I place lines 10 cm apart. Stitching will take a couple of evenings. And that’s what I need. Dear “Vikings”, I’m coming.
Later I will find out that because of yet so light, but so fluffy interlining the foot of an overlock will constantly get stuck. For a hundred times I’ll think of sewing every seam by hand.
The Interfacing Pack
I build the inner structure layer by layer:
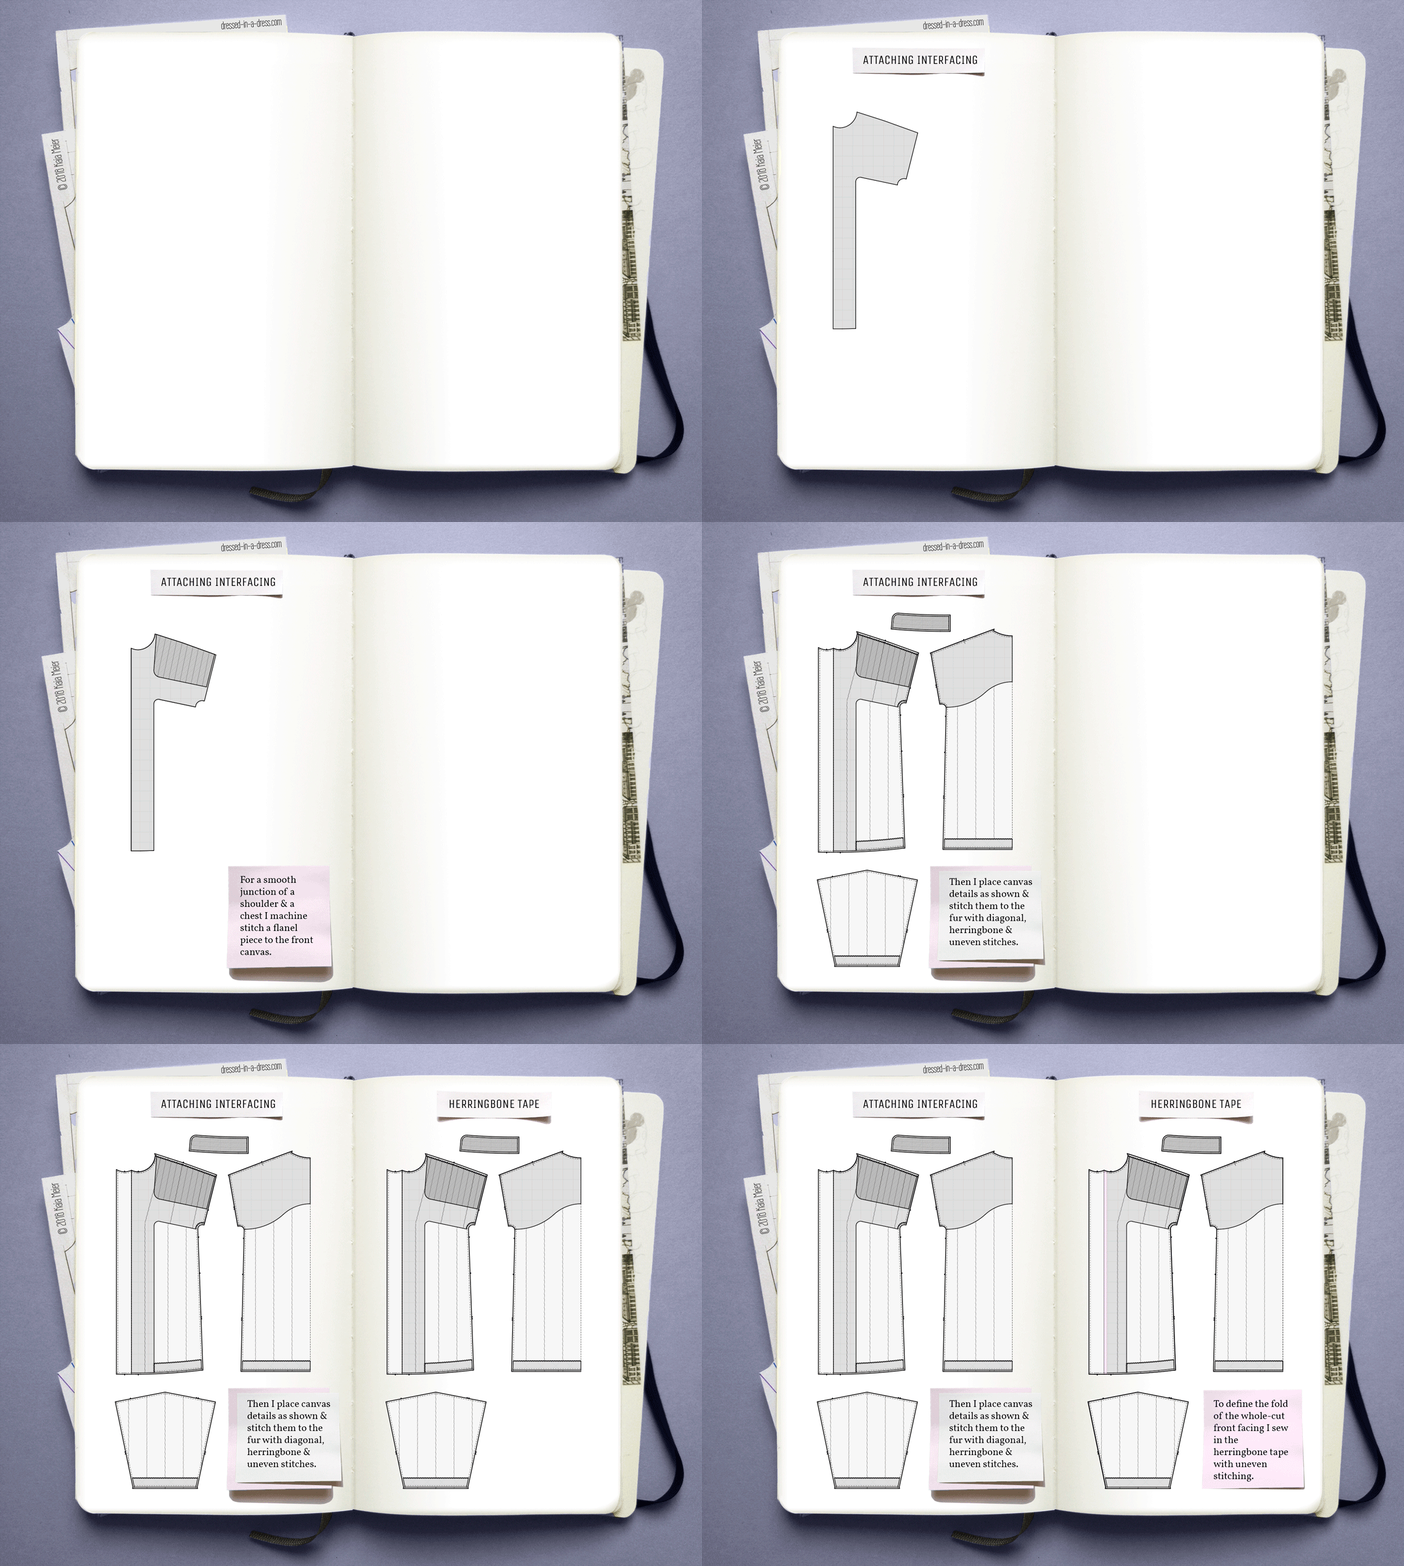
- I attach the shoulder pad to the front’s interfacing with parallel rows of machine stitches.
- Then I lay the front interfacing on its place and pin it. For the interfacing to stay in place, I fix it with hand stitches. At the shoulder and the side seam, I use a herringbone stitch, at the interfacing itself—diagonal stitches.
- On the back, I simply baste the canvas to the fur. But the outer detail of the collar is quilted with vertical rows of small diagonal stitches. Here, the stiffness of the detail depends on the stitch density. At the edges, I place lines closer to each other so that the collar becomes slightly wrapped inward.
- I pin a strip of hair canvas, which I cut on a bias, above the hemline of the coat and sleeves. At the top, I sew it with a herringbone stitch, and at the bottom—with uneven stitches.
- And here is the final ascent, which no one, of course, will see. By the same uneven stitches, I sew a light-pink herringbone tape to the fold of the front facing.
The cotton herringbone tape stabilizes the fold of the front facing.
The colour is not important, of course, but it gives me a good mood. It feels warm and joyful when the garment has small secrets, of which no one else knows.
The Epilogue
So much have been done, and the fur coat still lies in pieces, but it’s ok. Here the material and the internal structure play the leading role. Still, I will have to work hard, smoke will go from the overlock and my ears. In the heat of the moment, I say that I will never ever work with eco fur again.
This all will be gone as soon as I step out onto the snow-covered street and realize that, despite the cold temperature, the coat is warm as it should be. After walking a couple of blocks I think that one coat in the wardrobe, for sure, must feel lonely, and it needs the same shaggy company. And this means that it was not so scary, and efforts were not made in vain.
xoxo
Yours,
Kaia
