Making of a Dress Form. Part 1. The Beginning
Category: Design Process 02 September 19

One year and five months I’ve spent deciding which tailor’s dummy to buy. I saw it in my dreams, it tormented me by thoughts of the tops of draping, which I could conquer with it. The discrepancy between the desired and affordable option drove me into a week of melancholy.
The Options
Time had passed, and I was still rushing from one option to another. I chose between a soft substandard dummy with short legs for a relatively adequate price and a firm one with a skirt and the shipping price, that cost as much as the dummy itself. Both had clear and detailed markings and almost the same measurements.
The legs give more freedom in fitting and draping, but the first dummy looked like a soft toy, which was not an advantage here. And its buttocks were flat, and the bust-cups were unclear.
The second option was many times better in quality, and it looked anatomically right, but I wouldn’t be able to put pants on it. In addition, both dummies are 10 cm taller than me.
Yes, of course, the horizontal measurements and heights of the dummy may be adjusted: skilfully pinned shoulder pads and synthetic underlining add volume in the right place and raise the waist and hips. But then the dummy will not be perfect, it will not be “mine,” and those pieces here and there will constantly remind about this – an endless headache and remorse.
The Decision
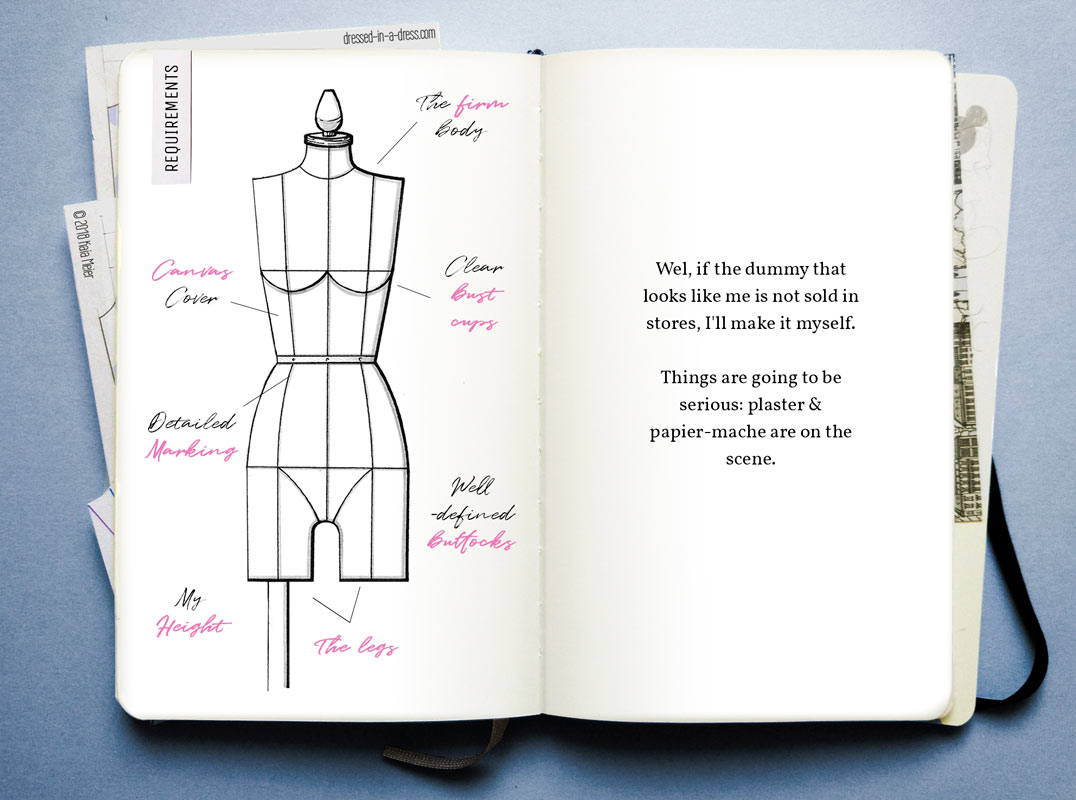
In late February, I finally determined that both options wouldn’t work. My relatives exhaled with relief – in vain. I have a new idea: if the dummy that looks like me is not sold in stores, I’ll make it myself.
I am stubborn and skilled enough. And I am not talking about packing tape, scotch tape and mounting foam.
I need a dummy that will last for years and will not lose its shape, it should withstand constant pinning and steam ironing. Things are going to be serious: plaster and papier-mache are on the scene. Sometimes it is useful to be a person with creative education.

For 3 weeks I’d been feverishly collecting grains of information, which later suddenly lined up in a clear sequence of actions. I divided the manufacturing of the dummy at home into 4 main stages:
- Plaster mould
- Papier-mache cast
- Canvas Cover
- Stand
No matter how much I wanted it, it was impossible to cope with such a list alone. Therefore, my faithful companion and assistant had no choice but to surrender under the pressure of requests, the price for a manufactured dummy and the flow of facts about the mannequin-building process.
Let magic begin.
Materials
Making a plaster mould is not a hard task, but only at first glance. To begin with, it is important to purchase good-quality materials and enlist the support of the loved one.
For the work I needed:
- Brave assistant. The person, next to whom you feel comfortable to be in your underwear.
He or she will make a mould. It’s better for them to wear an old t-shirt and pants, as they might get dirty.
- Children’s markers for marking on the body.
Make sure you don’t buy permanent markers because if you do, you will have a pretty unusual tattoo for a couple of weeks.
- Plaster bandages 10 cm wide (from the pharmacy) for the mould – 720 m (my size is 34)
- Vaseline, so you don’t get stuck in a plaster cocoon and you won’t have unexpected depilation*. – 500 g (half is needed in the papier-mache phase)
*It makes sense to pre-treat the body with a depilatory cream. Do it, seriously.
- Trash bags or greenhouse film, so that later you do not have to wipe the floor of white spots. – 3 x 3 m
- 4 buckets of warm clean water for soaking bandages
- A trash bag in order not to scatter plaster wrappings anywhere.
- A bra** with wires and panties, which you can easily through away after. Vaseline is merciless, alas.
**The bra must match the shape that you normally wear.
- Scissors in case the hair on the back of the head stuck in a mould.
- Drinking water with a straw in case of sudden thirst
- Napkins to wipe off excess vaseline, as soap can hardly cope with this amount.
- Plasticine for smoothing out the mould on the inside – 500 g or more
The Place
Once the materials are purchased, I arrange them in place, as there will be no time to run around the house and look for scissors. Although plaster dries quickly, it weighs a couple of kilograms or even more, and I will have to spend at least an hour and a half in it.
- In the living room, I spread a piece of film on the floor so that there is enough space to walk around it freely. I mark the place where I will stand in the centre.
- In the left upper and lower right corners of the film, I put half of the plaster bandages and 2 buckets of water.
I won’t be able to turn around and move once the moulding begins. Therefore, the sculptor will first work with the front, and then with the back part. And with this layout, the materials will lie on the right hand and he will not have to drag them, once the front is ready.
- On the table, there are Vaseline, napkins, scissors and a bottle of water with a straw.
Preparation
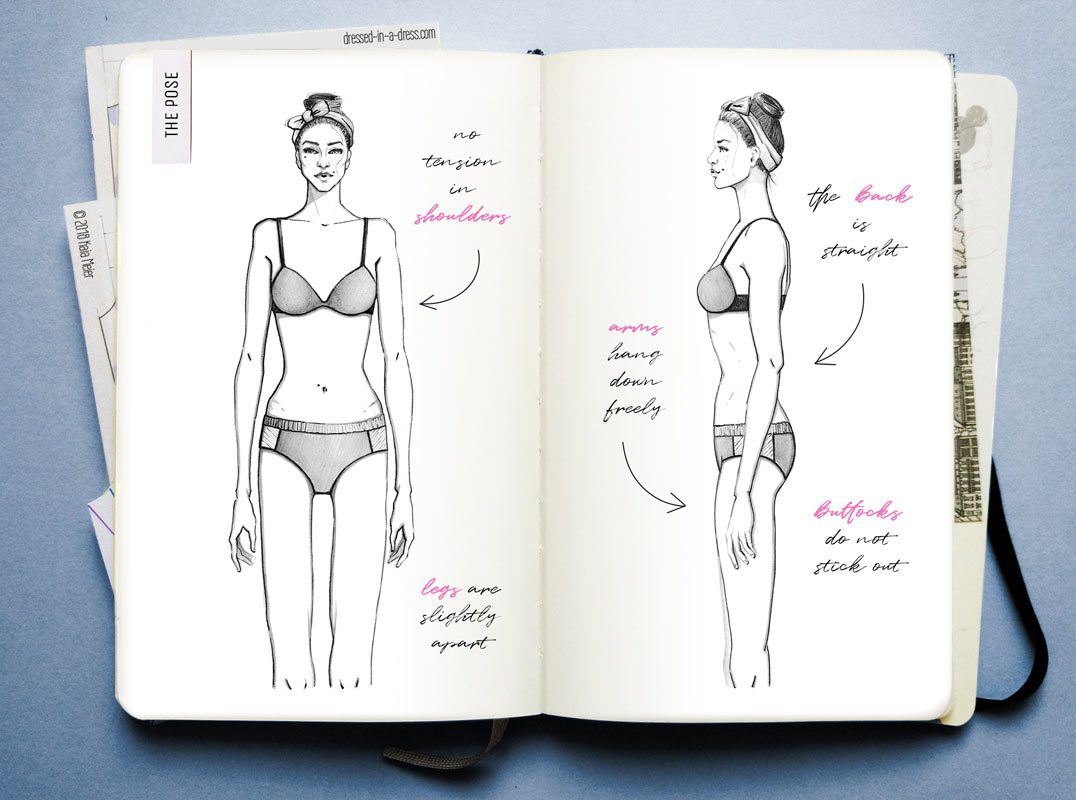
I put my hair up in a bun, change clothes and rehearse the pose again in front of the mirror:
- I keep my back straight
- My buttocks do not stick out
- Legs are slightly apart
- Arms hang freely
- There’s no tension in my shoulders

I should keep the pose natural. I slightly twitch from nervous excitement, take a deep breath, wink at myself in the mirror and stand in the middle of the film.
My task is both simple and endlessly difficult:
I should stand in one pose until the mould is ready. Deep inhaling, chewing and laughing will do no good.
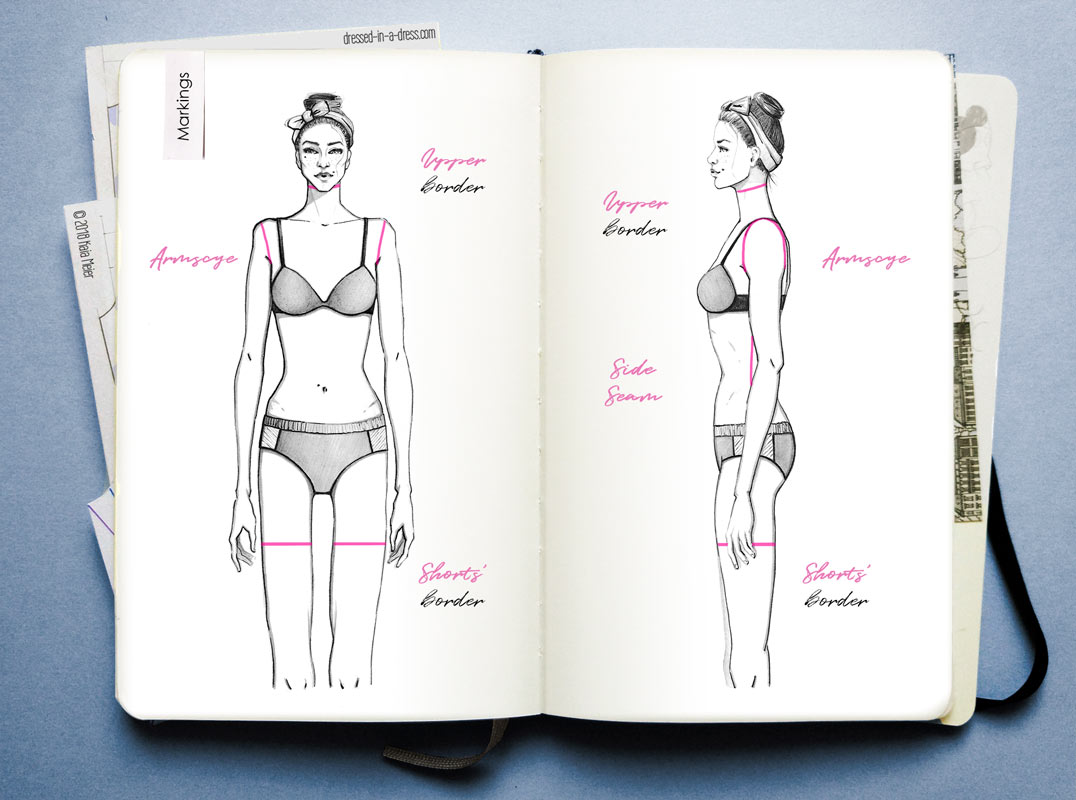
On the background, distant music is playing. My sweetheart draws the lower border of the shorts and the upper line of the neck, the contours of the armholes, the shoulder and side seams, and also does not forget about the internal seam on the legs.

I shudder because it’s time for petroleum jelly. The thicker the body is covered, the less painful it will be later, and the easier it will be to rip off the mould.
Vaseline should cover everything that plaster can touch. This includes hair on the neck and the bottom of the head, underwear and what’s under it.
Well, it seems, we are ready for the next step.
xoxo
Yours,
Kaia
