Making of a Dress Form. Part 2. The Plaster Mold
Category: Design Process 09 September 19

When the praparation with all the materials, a place and a right pose for my future dress form was done, we were ready to get to the point.
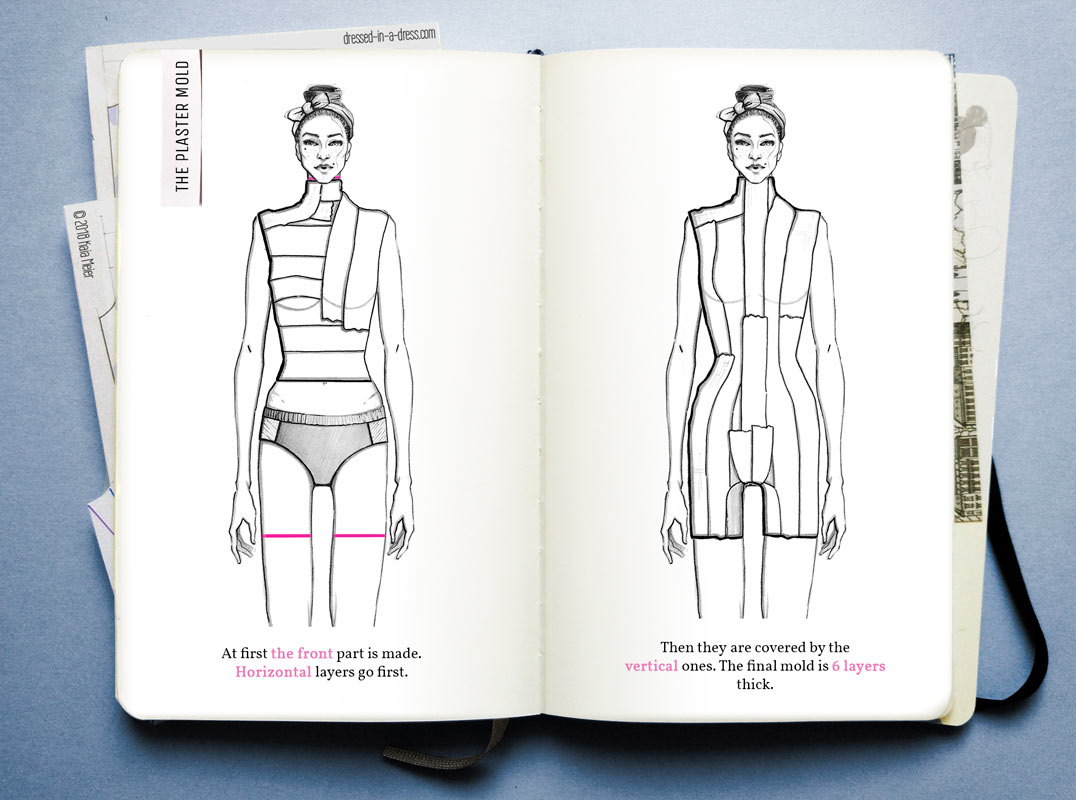
We’ve decided, that the final plaster mold would consist of two layers: one horizontal and one vertical. Each layer would be made of 3 layers of plaster bandage. So, it will be 6 layers thick. This will make the mold firm enough to keep the shape and not get wet with moisture from papier-mache.
Expectations
The Front
My sculptor opens the plaster package with precise movements, determines the length of the first piece by eye, multiplies it by 3 and tears the strip from the roll with a noise.
- The dust hasn’t settled yet, when my darling dips the plaster strip into clean water for a couple of seconds, squeezes out the water and instantly puts the bandage on my neck in front.
We make the front and the back separately, so I won’t stick in the mold. To then easily part the front half from the back, he aligns the edges of the front plaster stripes with the lines he drew on me before.
- It’s cold, plaster drops roll down from my neck, and leave a white path behind. In horizontal rows, a strip by a strip (3 layers each), plaster covers me on the front.

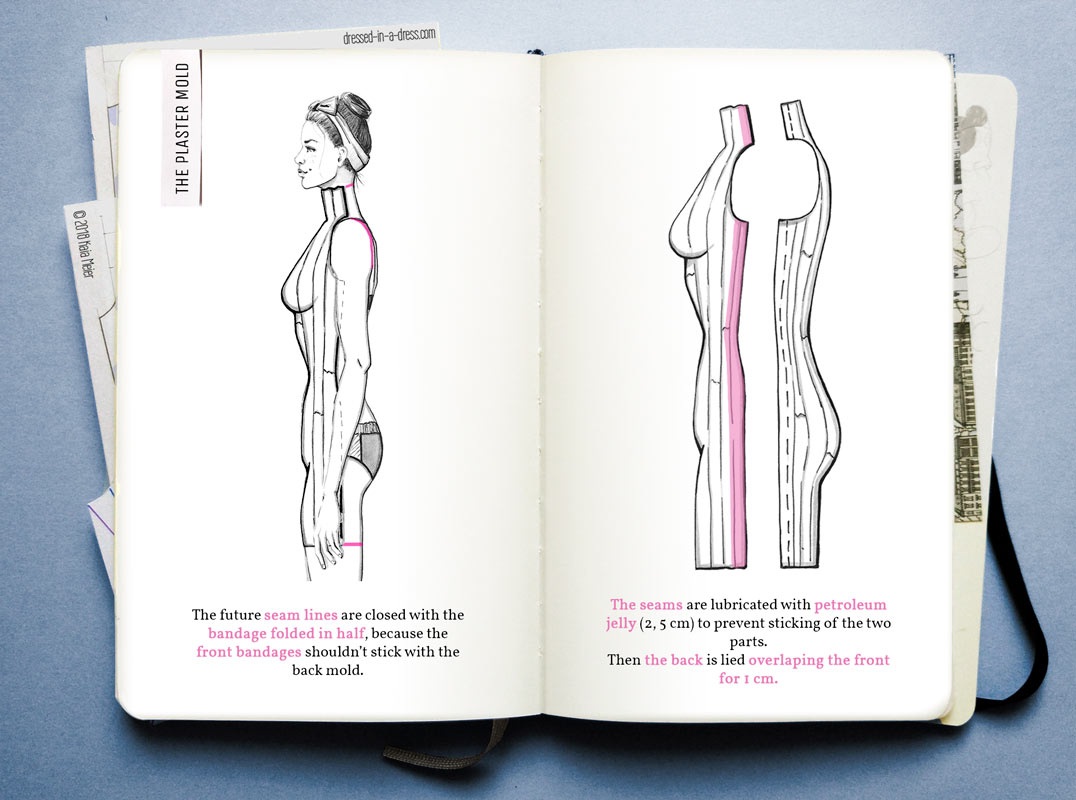
On the seam lines, my sculptor gently closes the future junction of the front and the back with the bandage folded in half. If the bandage from the front piece sticks with the back mold, it will be difficult to separate them.
- After that, the vertical strips lay on top of the horizontal ones, also 3 layers each.
Standing as a guard soldier I try not to lean forward, which is not so easy to do: the plaster is heavy, and gravity has not gone away.
The Back
- The back part overlaps the front for 1 cm.
Before that, the seams should be densely lubricated with petroleum jelly so that it comes on the front of 2.5 cm. After that, the front detaches from the back as easily as the two halves of the Kinder Surprise Egg.

- When the plaster is laid, it remains to wait for drying. Readiness is defined by “metallic” ringing when knuckled.
The cherished ringing sounded, and my darling neatly separates the back from the front. Despite Vaseline, short hair on the back of the head stuck in a mold, so he has to cut it off. A minute later, both plaster halves lay on the floor, and I feel like I lost 10 kg.
The mold causes mixed emotions: it’s so strange to see myself from the side, everything is not the same as in the mirror, so detailed. I can even see the vertebrae and the dimple under the ribs. A memorable experience, but I hope that won’t have to repeat it in the next couple of years.
The Finishing Touch
The next day, when the plaster mold finally dries.
- I close the armholes and smooth out the inner imperfections with plasticine.
The plaster mixture would work better, but I could not find it, and plasticine was lying in a box from my student days.
- Then I close the armholes with plaster bandages on the outside, to make sure the form won’t lose the shape.
I make a deep breath, seems like I can’t stand the smell of plaster anymore. It’s ok, it seems that the work is ready, at least this part. But this is only the beginning, and there is still so much to come.
Credits
Two videos from professionals of lifecasting have helped us a lot: one & two. In them, guys talk about the preparation of bandages, plaster, seams and joints. They don’t draw any markings on the body, so I added this myself, as I find this useful in case of unexpected situation, like the one that happened to me (read below).
Be careful: naked women may appear.
Reality
Molding really did go interesting and funny, but only until the moment when I started to suffocate. Plaster got stiff quickly and began to press on my chest from above. I could not take a deep breath. As a result, I panicked, turned pale, my legs betrayed me, and I was about to faint. But my prince Charming reacted in time. He caught me, with an easy movement took the mold off and laid me on the floor. I woke up in 10 seconds and felt surprisingly fresh, which was strange.
My mistake was that I ignored a nourishing breakfast and an equally nutritious lunch. I decided that a sandwich, a piece of cake and a cup of coffee would give me enough strength.
And we did not talk much, and the only thing I thought about was that I can not breathe normally. That was also wrong.
So, if you have panic attacks and/or problems with legs, the heart and breathing or other health issues, please, DON’T do it.
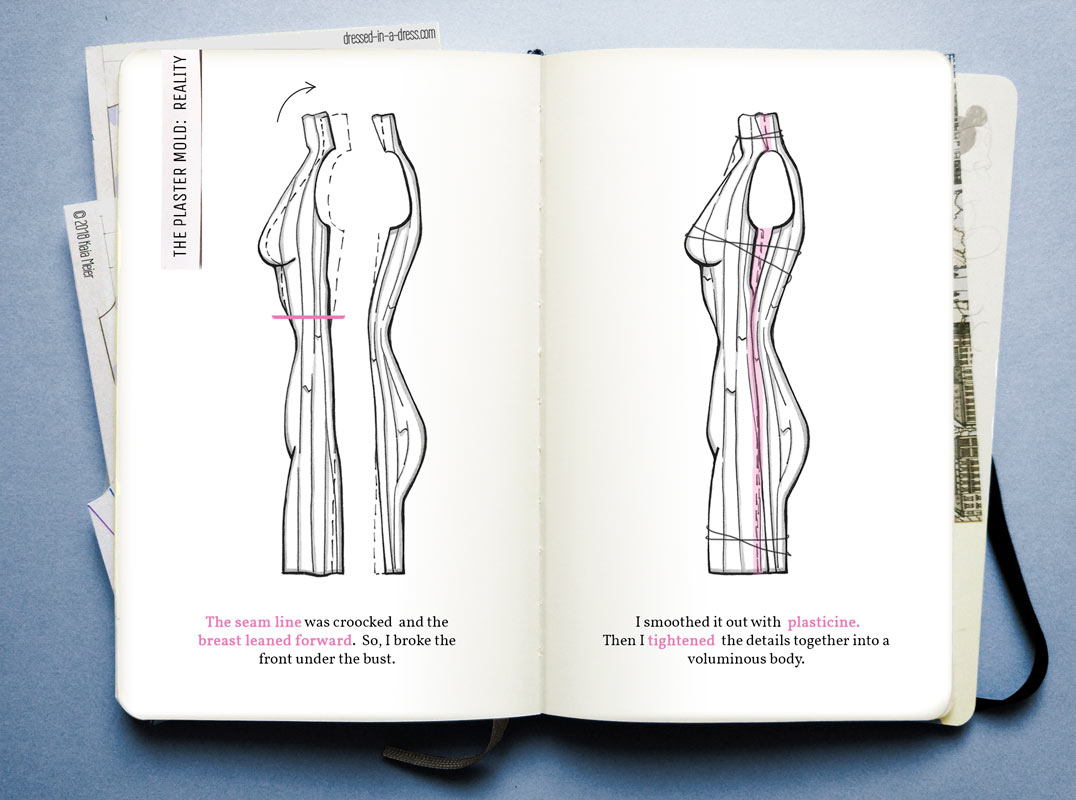
After a 30-minutes picnic with fruit and yoghurt in the middle of our living room, we made the back without any adventures. But because of my faint, we couldn’t make a good joint of the parts and the breast leaned forward because my sweetheart ripped it off me. So I spent 5 days cutting the front and putting the parts together like a broken lego. Then I smoothed them out with a ton of plasticine.

The only way out of this situation was to tighten the details together, to join them into a voluminous body instead of 2 open halves. Yes, it is not easy to spread papier mache, but it is possible: I still have holes in the neck and legs.
Everything went wrong, but it worked better than it could. That’s why instead of a detailed photo report here are nice drawings of mine. Although, frankly speaking, I did not initially want to have photographs of me in the underwear.
Hope, if you decide to take this adventure you will avoid my mistakes.
xoxo,
Kaia

 My Etsy Store