How to Sew a Crew Neckband for a T-shirt
Category: Tutorials 02 June 21
This tutorial is a complementary post for Jane: Boxy Crewneck T-shirt pattern which I currently release for free.
The Prologue
Cruising through currants of so-alike-but-yet-different manufactured T-shirts, I could never find a perfect one for years. Scrolling from time to time through “Best 20 T-shirts to buy in 20.. (insert the year)”, I hoped I would find that matching tee for the skirt, which is lonely hanging in the closet. My hope was drawing sinus curves every time I ran my fingers through store clothing racks.
I had to buy a couple of almost perfect ones to finally realise it would be less painless and way faster to sew it myself. The only thing stopping me was the neckline or, I’d better specify this, the lack of matching ribbing in the stores and the absence of my knowledge of knits’ behaviour. At some point, when I was about to steal a tee from my husband’s shelf, it occurred to me that I could make the neckline band out of self-fabric. The process seemed to be tricky at first, but it was worth the effort. While sewing the first T-shirt, I got unexpectedly inspired and woke up from a sewing marathon only after finishing the fourth T-shirt. After that, the neckline wasn’t such a big deal anymore.
So if you have already found the gorgeous fabric, and it is only the neckline that still stops you from sewing a bunch of fine crewneck T-shirts, of which you had been dreaming for years already, check the tutorial I prepared for you below.
To make this a lucky ticket, I also offer a Boxy T-shirt pattern for free.
The Process
Please, note that the accurate final result will be possible only with fabrics that contain natural fibres mostly and have at least 20%-stretch.
Before you start to sew the neckline, stitch the shoulder seams and press them to the back.
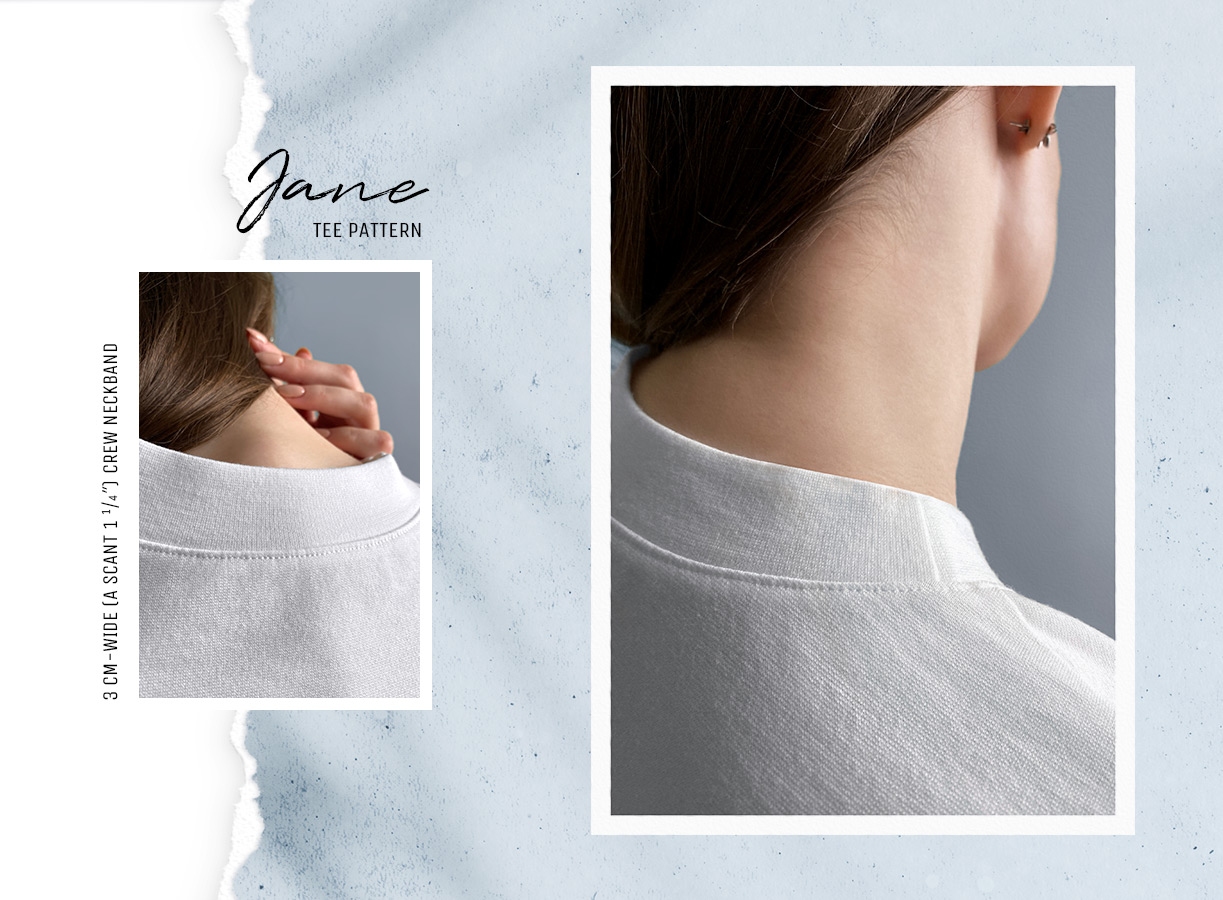
When finished, the common width of a crew neckband is 2.5–3.2 cm (1–1 1⁄4ʺ).
1. Prepare the neckline & the band
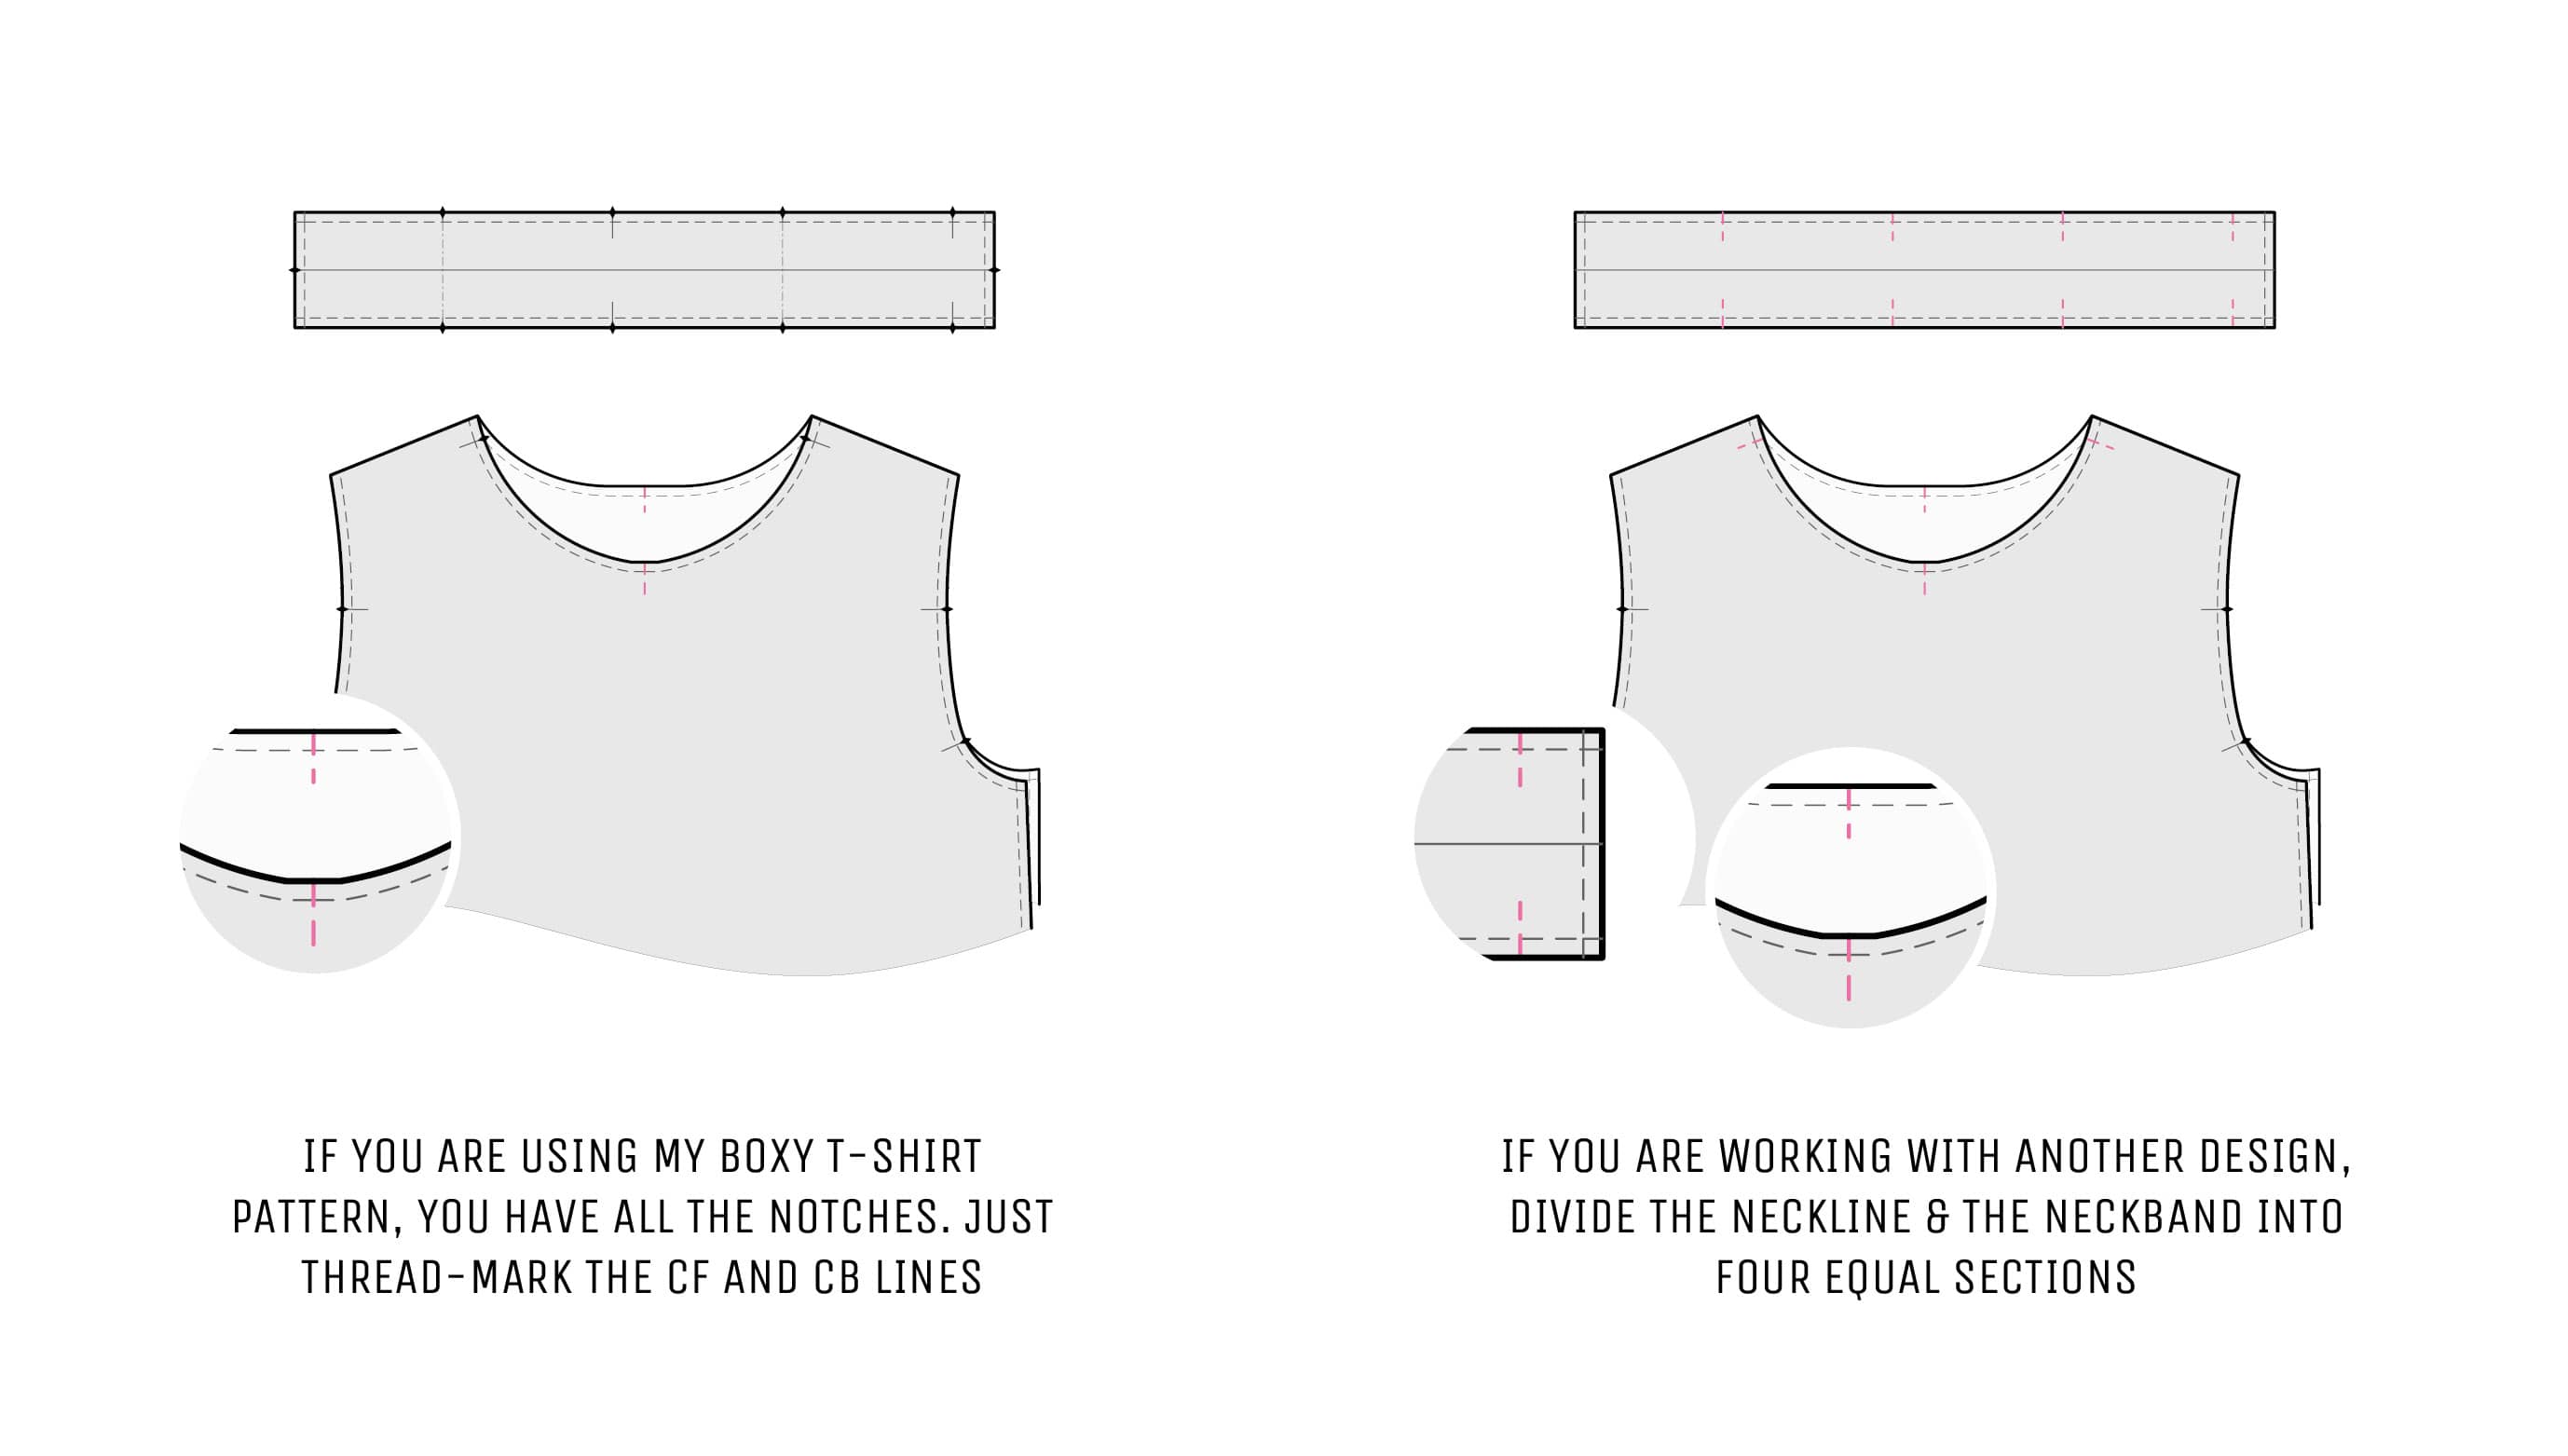
To set in the neckband correctly, you will need helpful marks to guide you. If you are using my Jane Tee pattern, congratulations—you already have all the notches—just don’t forget to thread-mark the CF and CB lines. If you are working with another design, follow the directions below to mark the notches correctly.
Mark the band & the neckline
Divide the neckline into four sections. At first, make thread tacks at the centre front and centre back lines, then match the front tack to the back one and make tacks in the folds that appear on the sides. They will be a couple of centimetres away from the shoulder seam. Next, move onto the neckline band.
If your neckband pattern piece doesn’t have any notches or marks, step approx. 2.5 cm (1ʺ) away from the short edge and make the first thread tack—this will help avoid bulk at the shoulder area later. Using the first tack as a starting point, divide the band into four sections and mark them with tacks.
Stitch & press the band
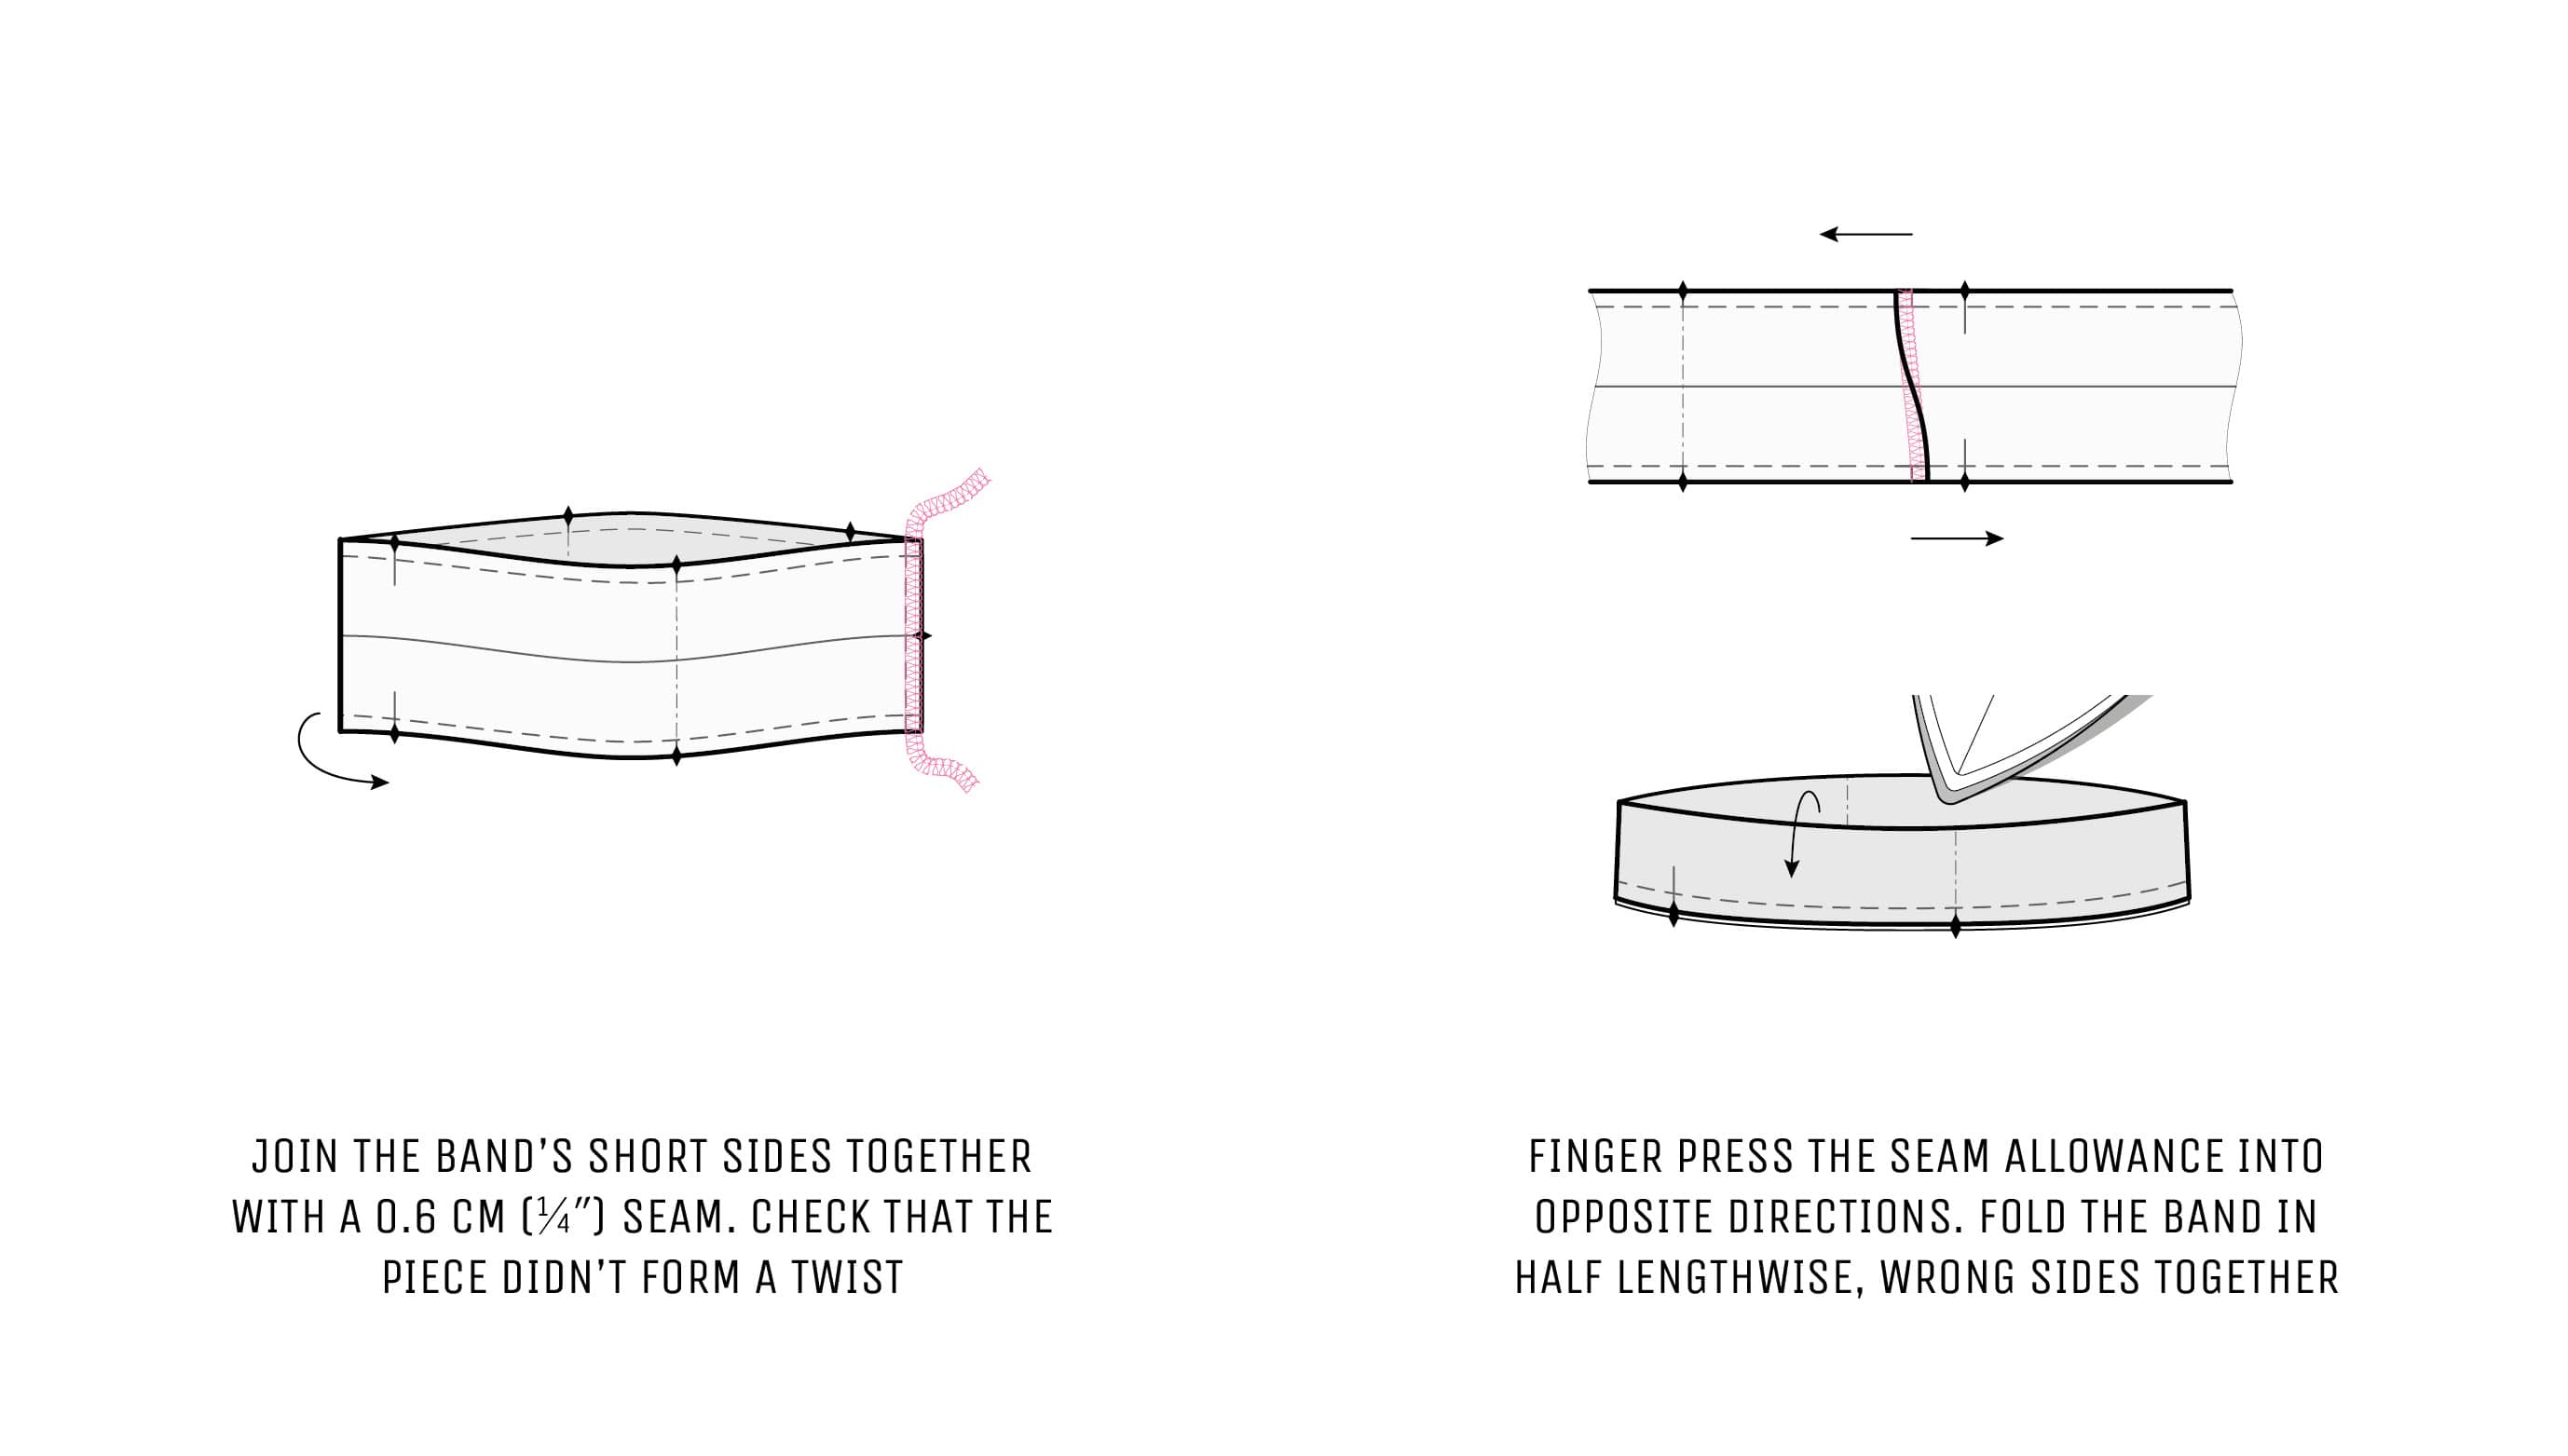
Place its short sides together and check that the piece didn’t form a twist. Join them with a 0.6 cm (1⁄4ʺ) seam using an overlock stitch. At the top and bottom edges, press the seam allowance into opposite directions with your fingers. Fold the band in half lengthwise, wrong sides together. Press the fold, but don’t stretch it.
2. Join the band & the neckline
Place the T-shirt right side facing up. Start pinning the band to the neckline, right sides together: pick the tack that is close to the band seam and match it to the right quarter tack. When you finish sewing, the band seam will be at the back, close to the shoulder.
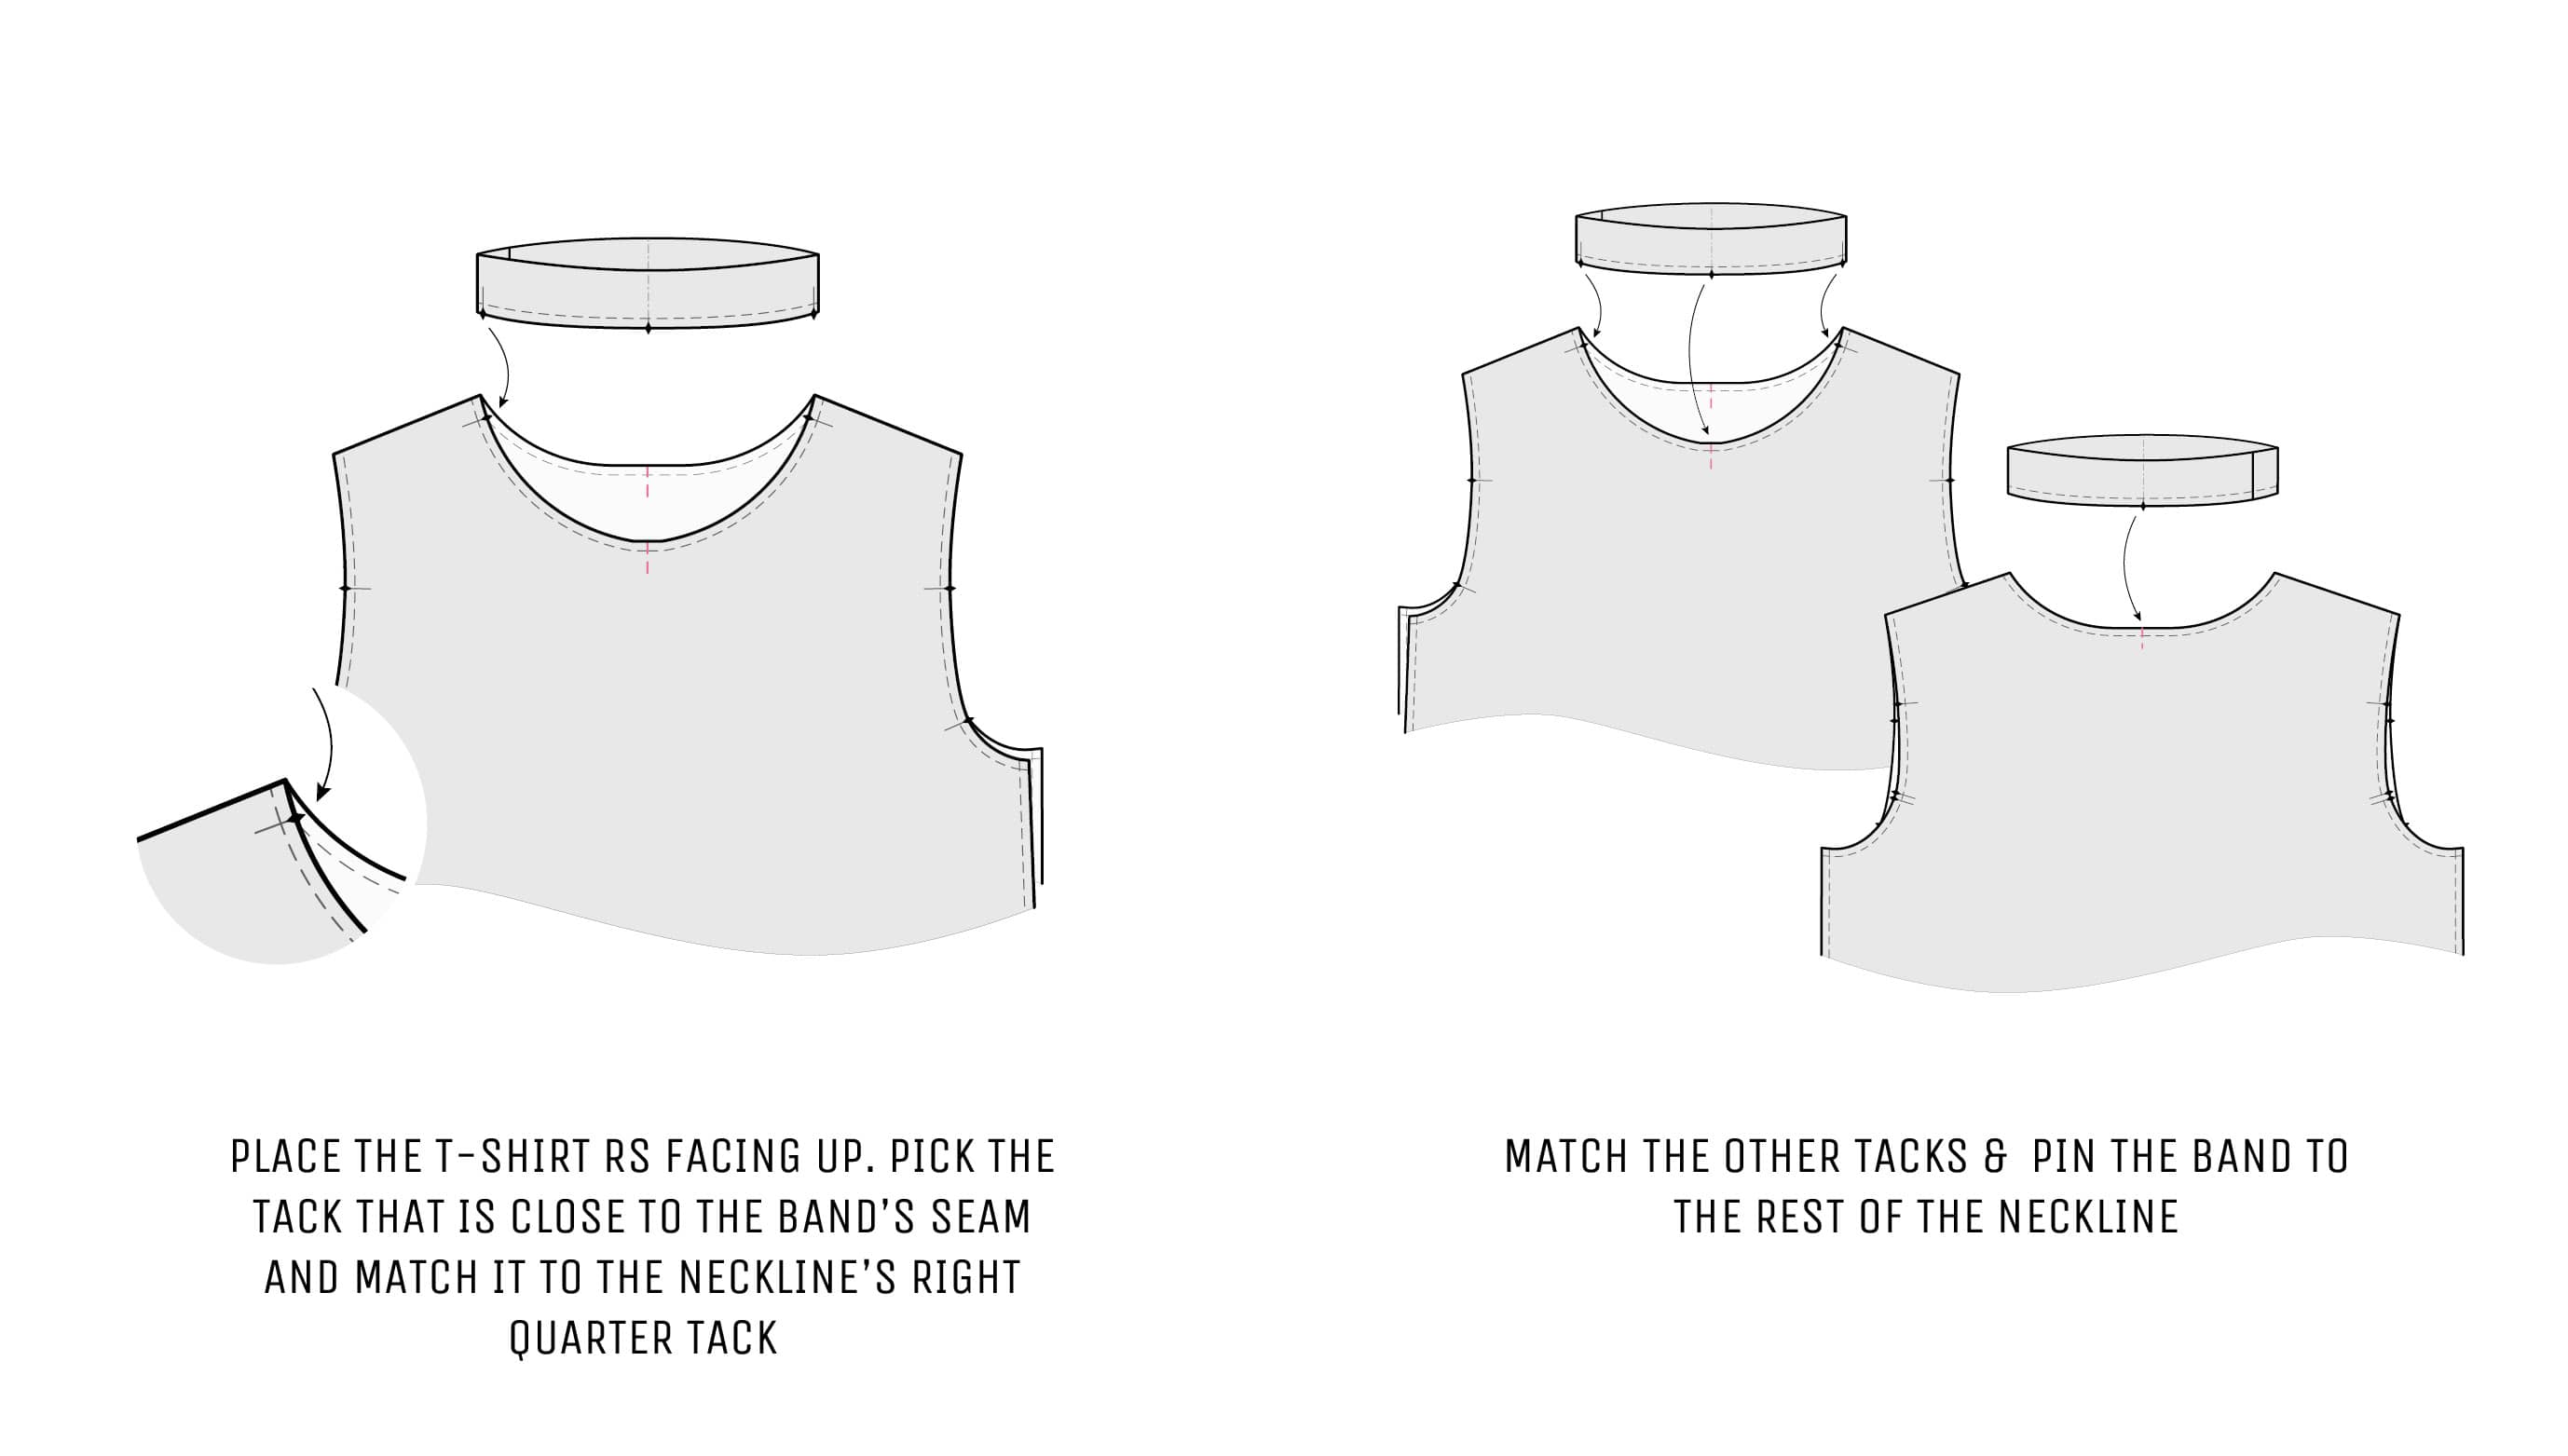
Match the other tacks and pin the band to the rest of the neckline. Carefully stretch the neckline and pin pieces together between previous pins. You might need two or three extra pins in each section.
A hint: Since the band is smaller, the neckline will form waves, and that’s what we need—the band should be smaller, so the neckline keeps its shape after multiple wears.
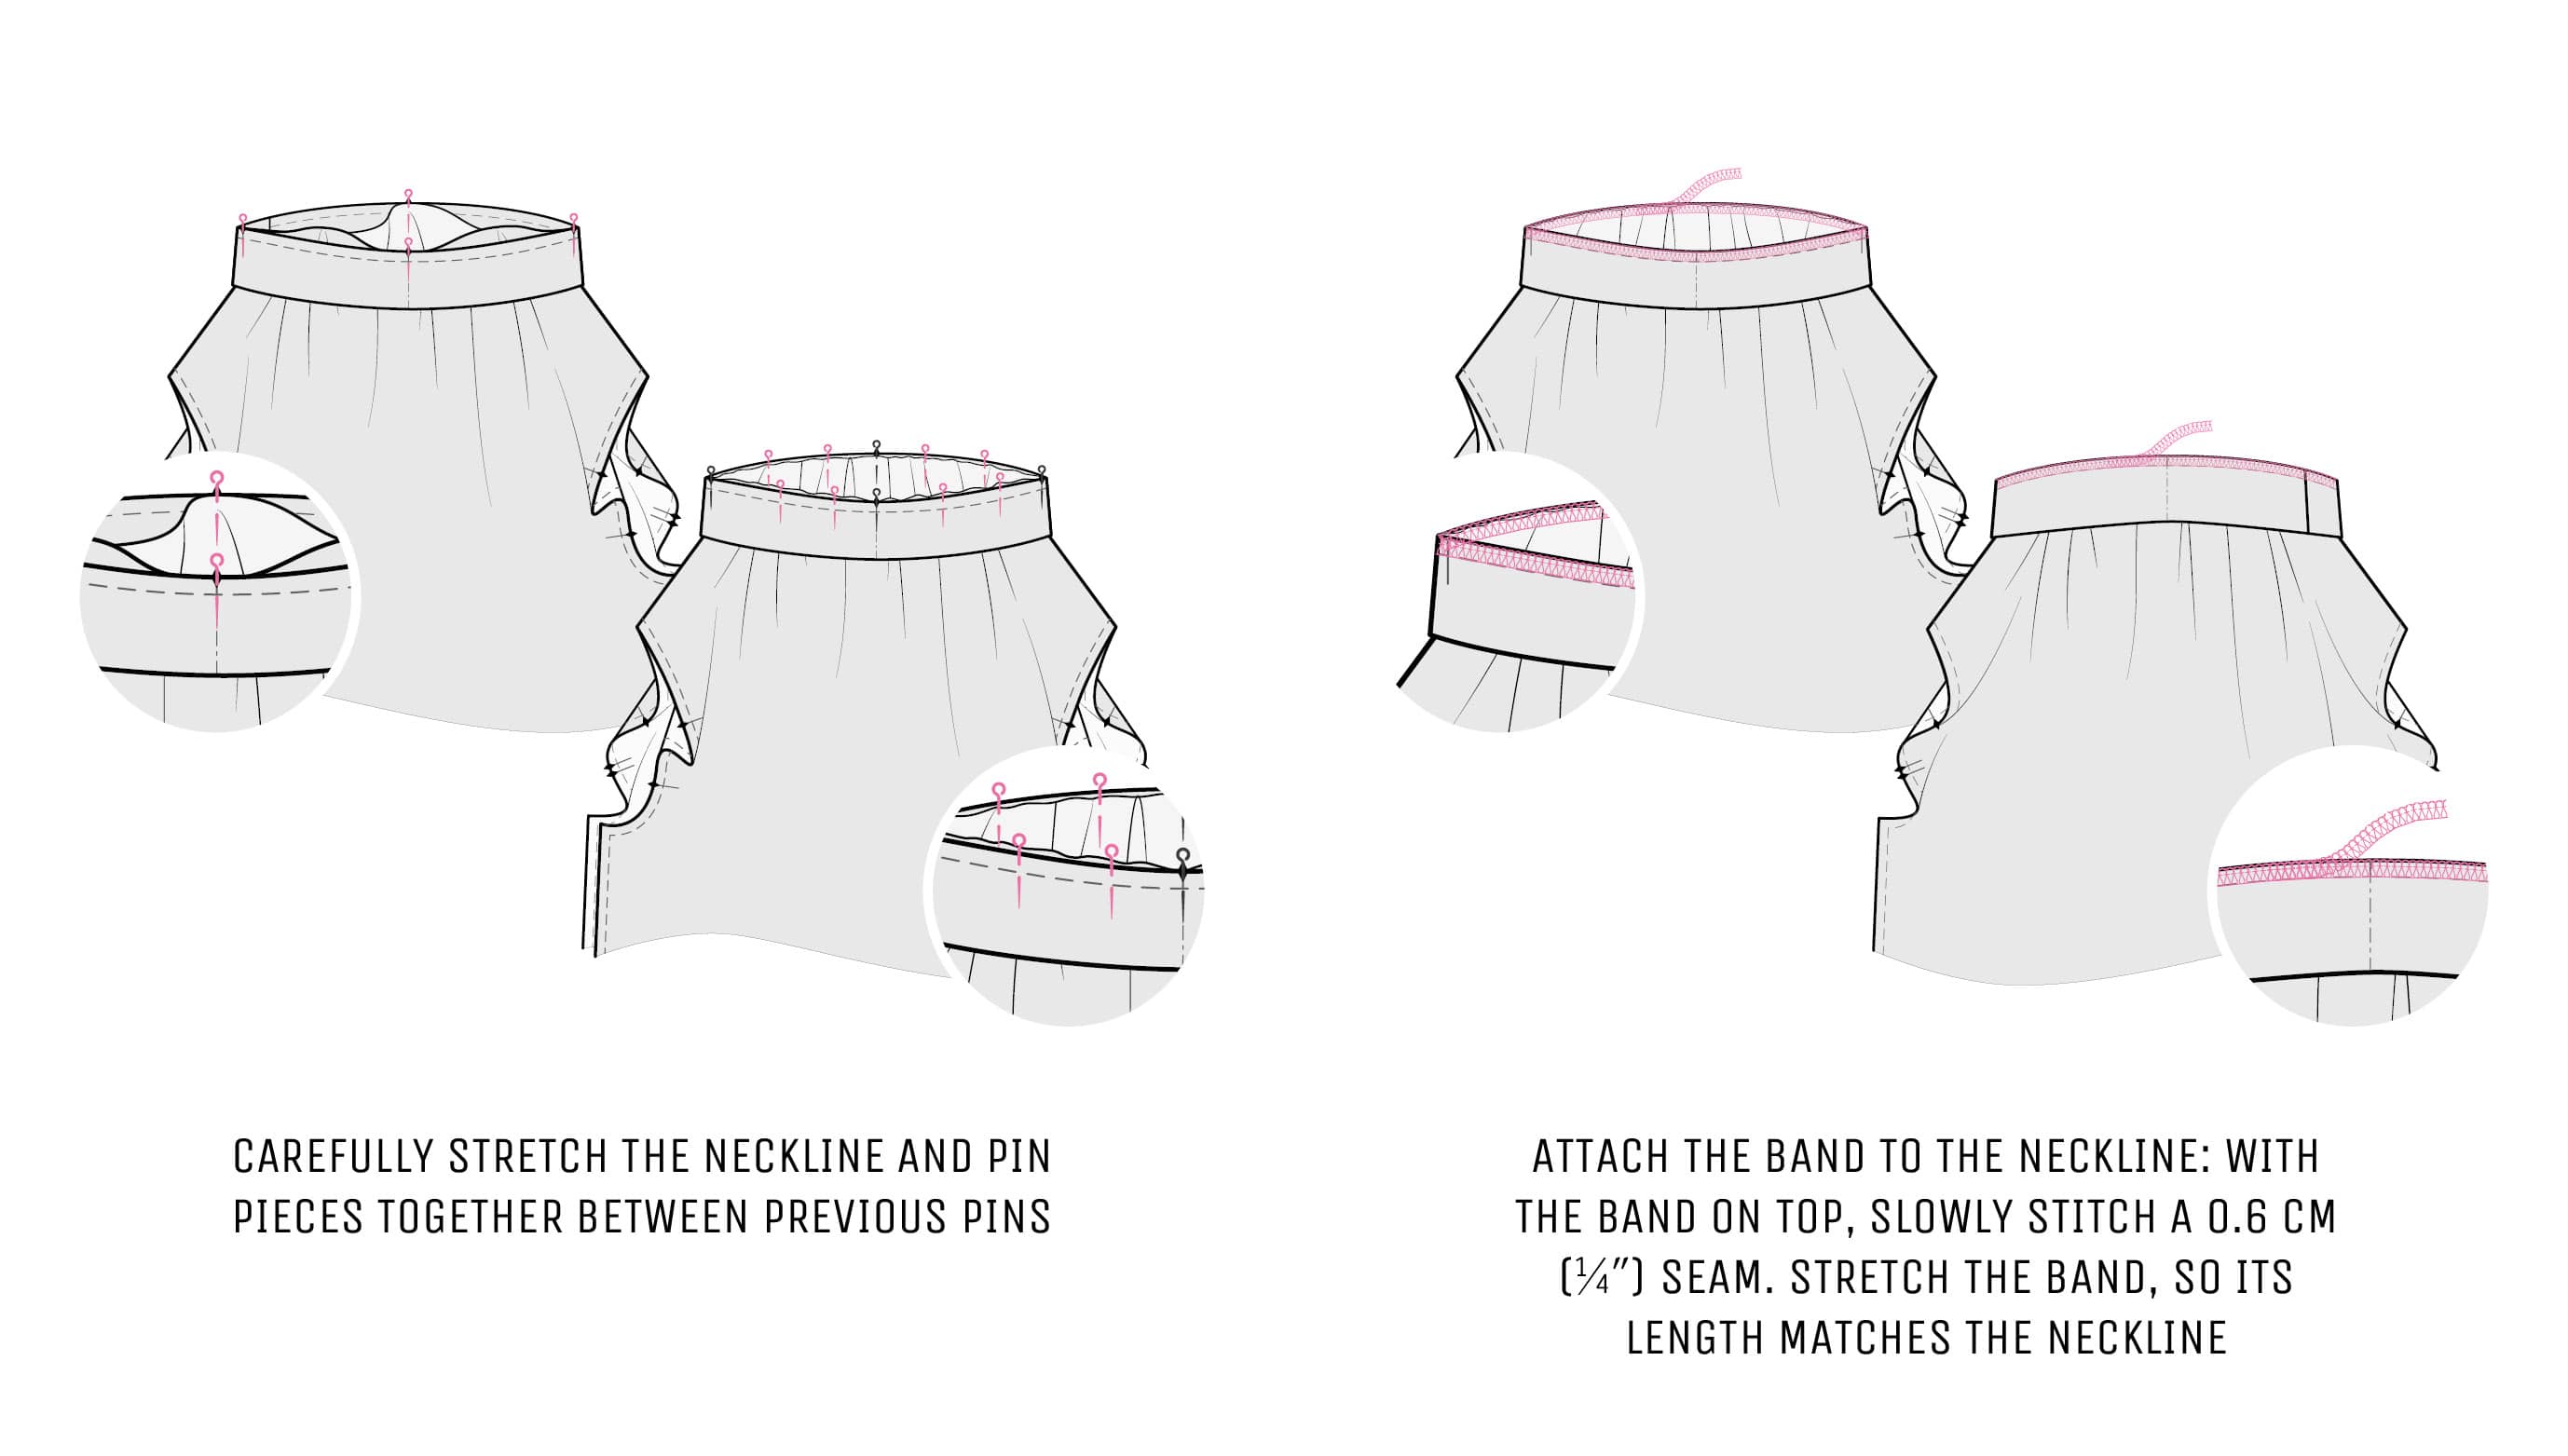
Attach the band to the neckline, using the in-round-method: with the band on top, slowly stitch a 0.6 cm (1⁄4ʺ) seam, using overlock stitch. Stretch the band so its length matches the neckline. Don’t sew on the pins; carefully remove them as you go and watch the fabric layers match.
A hint: To finish the stitching, make a couple of last stitches on top of the first ones and leave a thread tail—hide this tail in the seam allowance with the help of a big-eye needle.
3. Steam press the band & finish the neckline
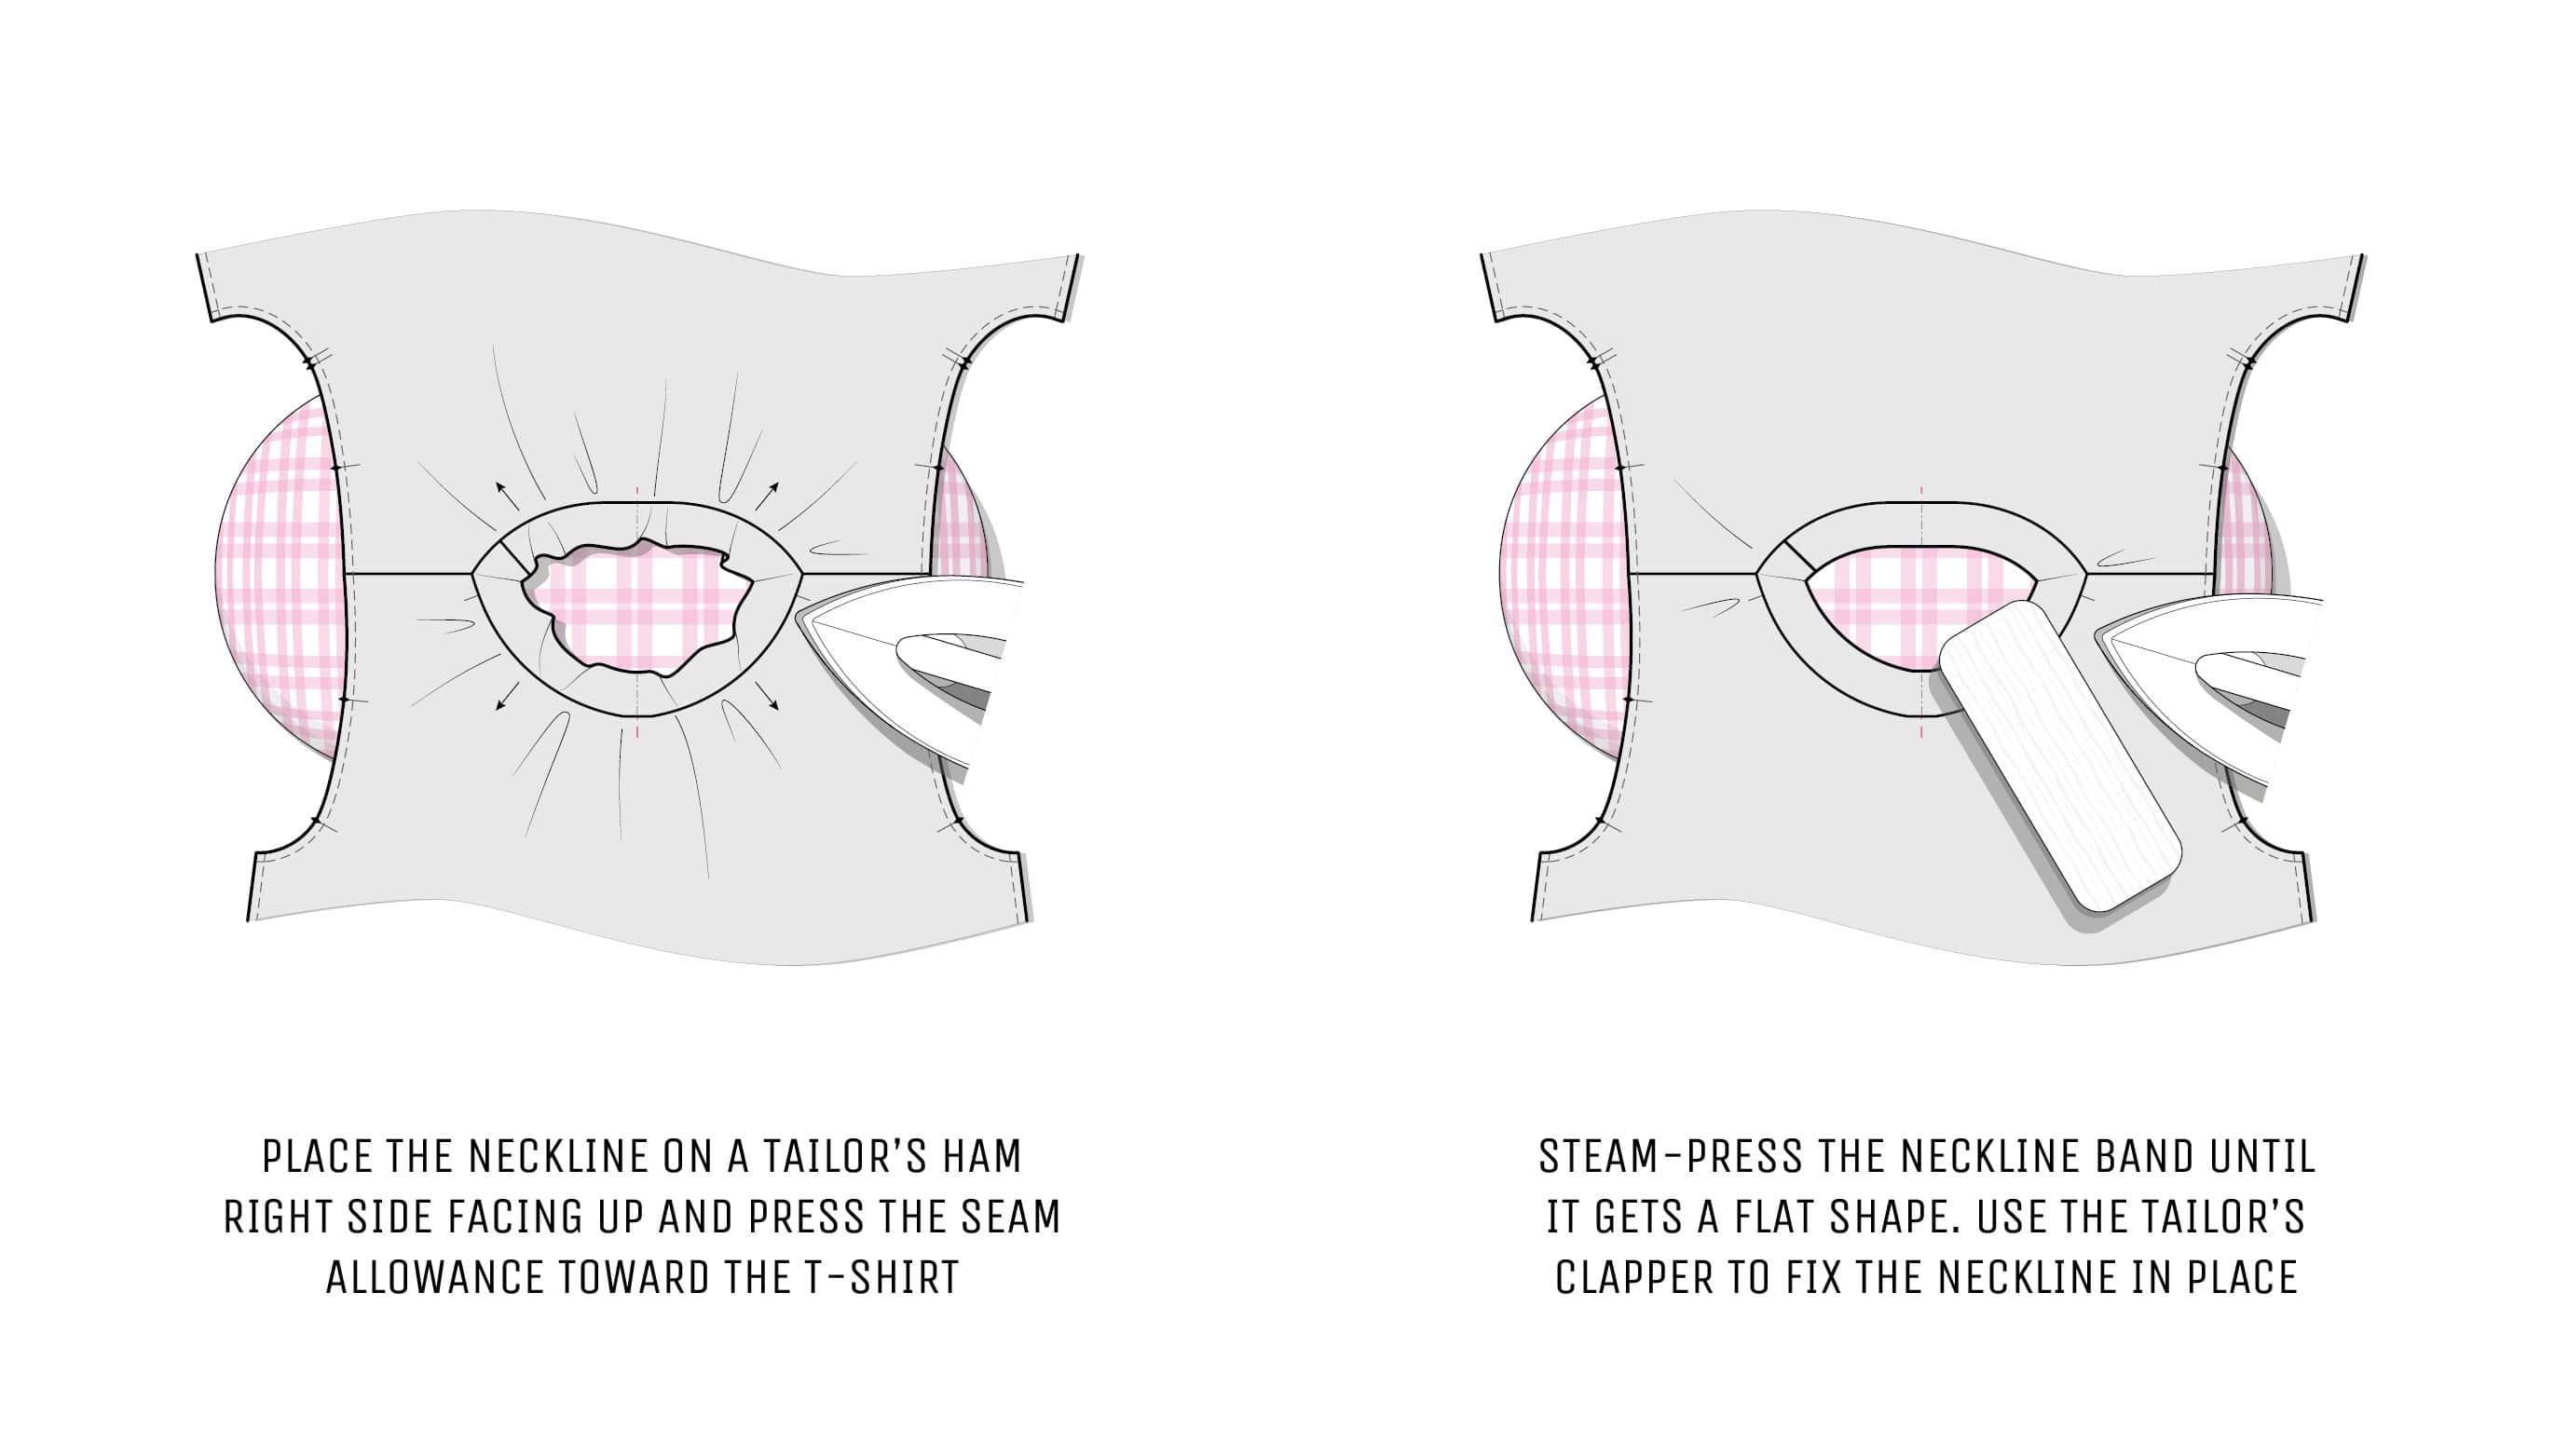
Place the neckline on a tailor’s ham right side facing up and press the seam allowance toward the T-shirt. Don’t take the T-shirt off the ham immediately—let it cool down.
Make careful movements with the iron’s tip and steam-press the neckline band until it gets a proper flat shape. After steam-pressing a particular area of the neckline, quickly press it with a tailor’s clapper or a folded ironing cloth. The cold of the clapper will secure the shape. In the end, the inner edge of the band should become shorter than the neckline seam—it will take time and patience.
A hint: if your fabric is a bit stubborn, try pressing the neckline through a wet pressing cloth.
A hint: shrinking or stretching the fabric with water, heat, and steam is a common practice in sewing. By playing with fabrics properties, you can achieve a better fit and eliminate darts in some designs. Please note, this is only possible in fabrics that contain natural fibres mostly.
When you are happy with the result, let the neckline cool down—don’t take it off the ham immediately, as it might stretch out. Understitch the neckline 0.2 cm (a scant 1⁄8ʺ) away from the seamline.
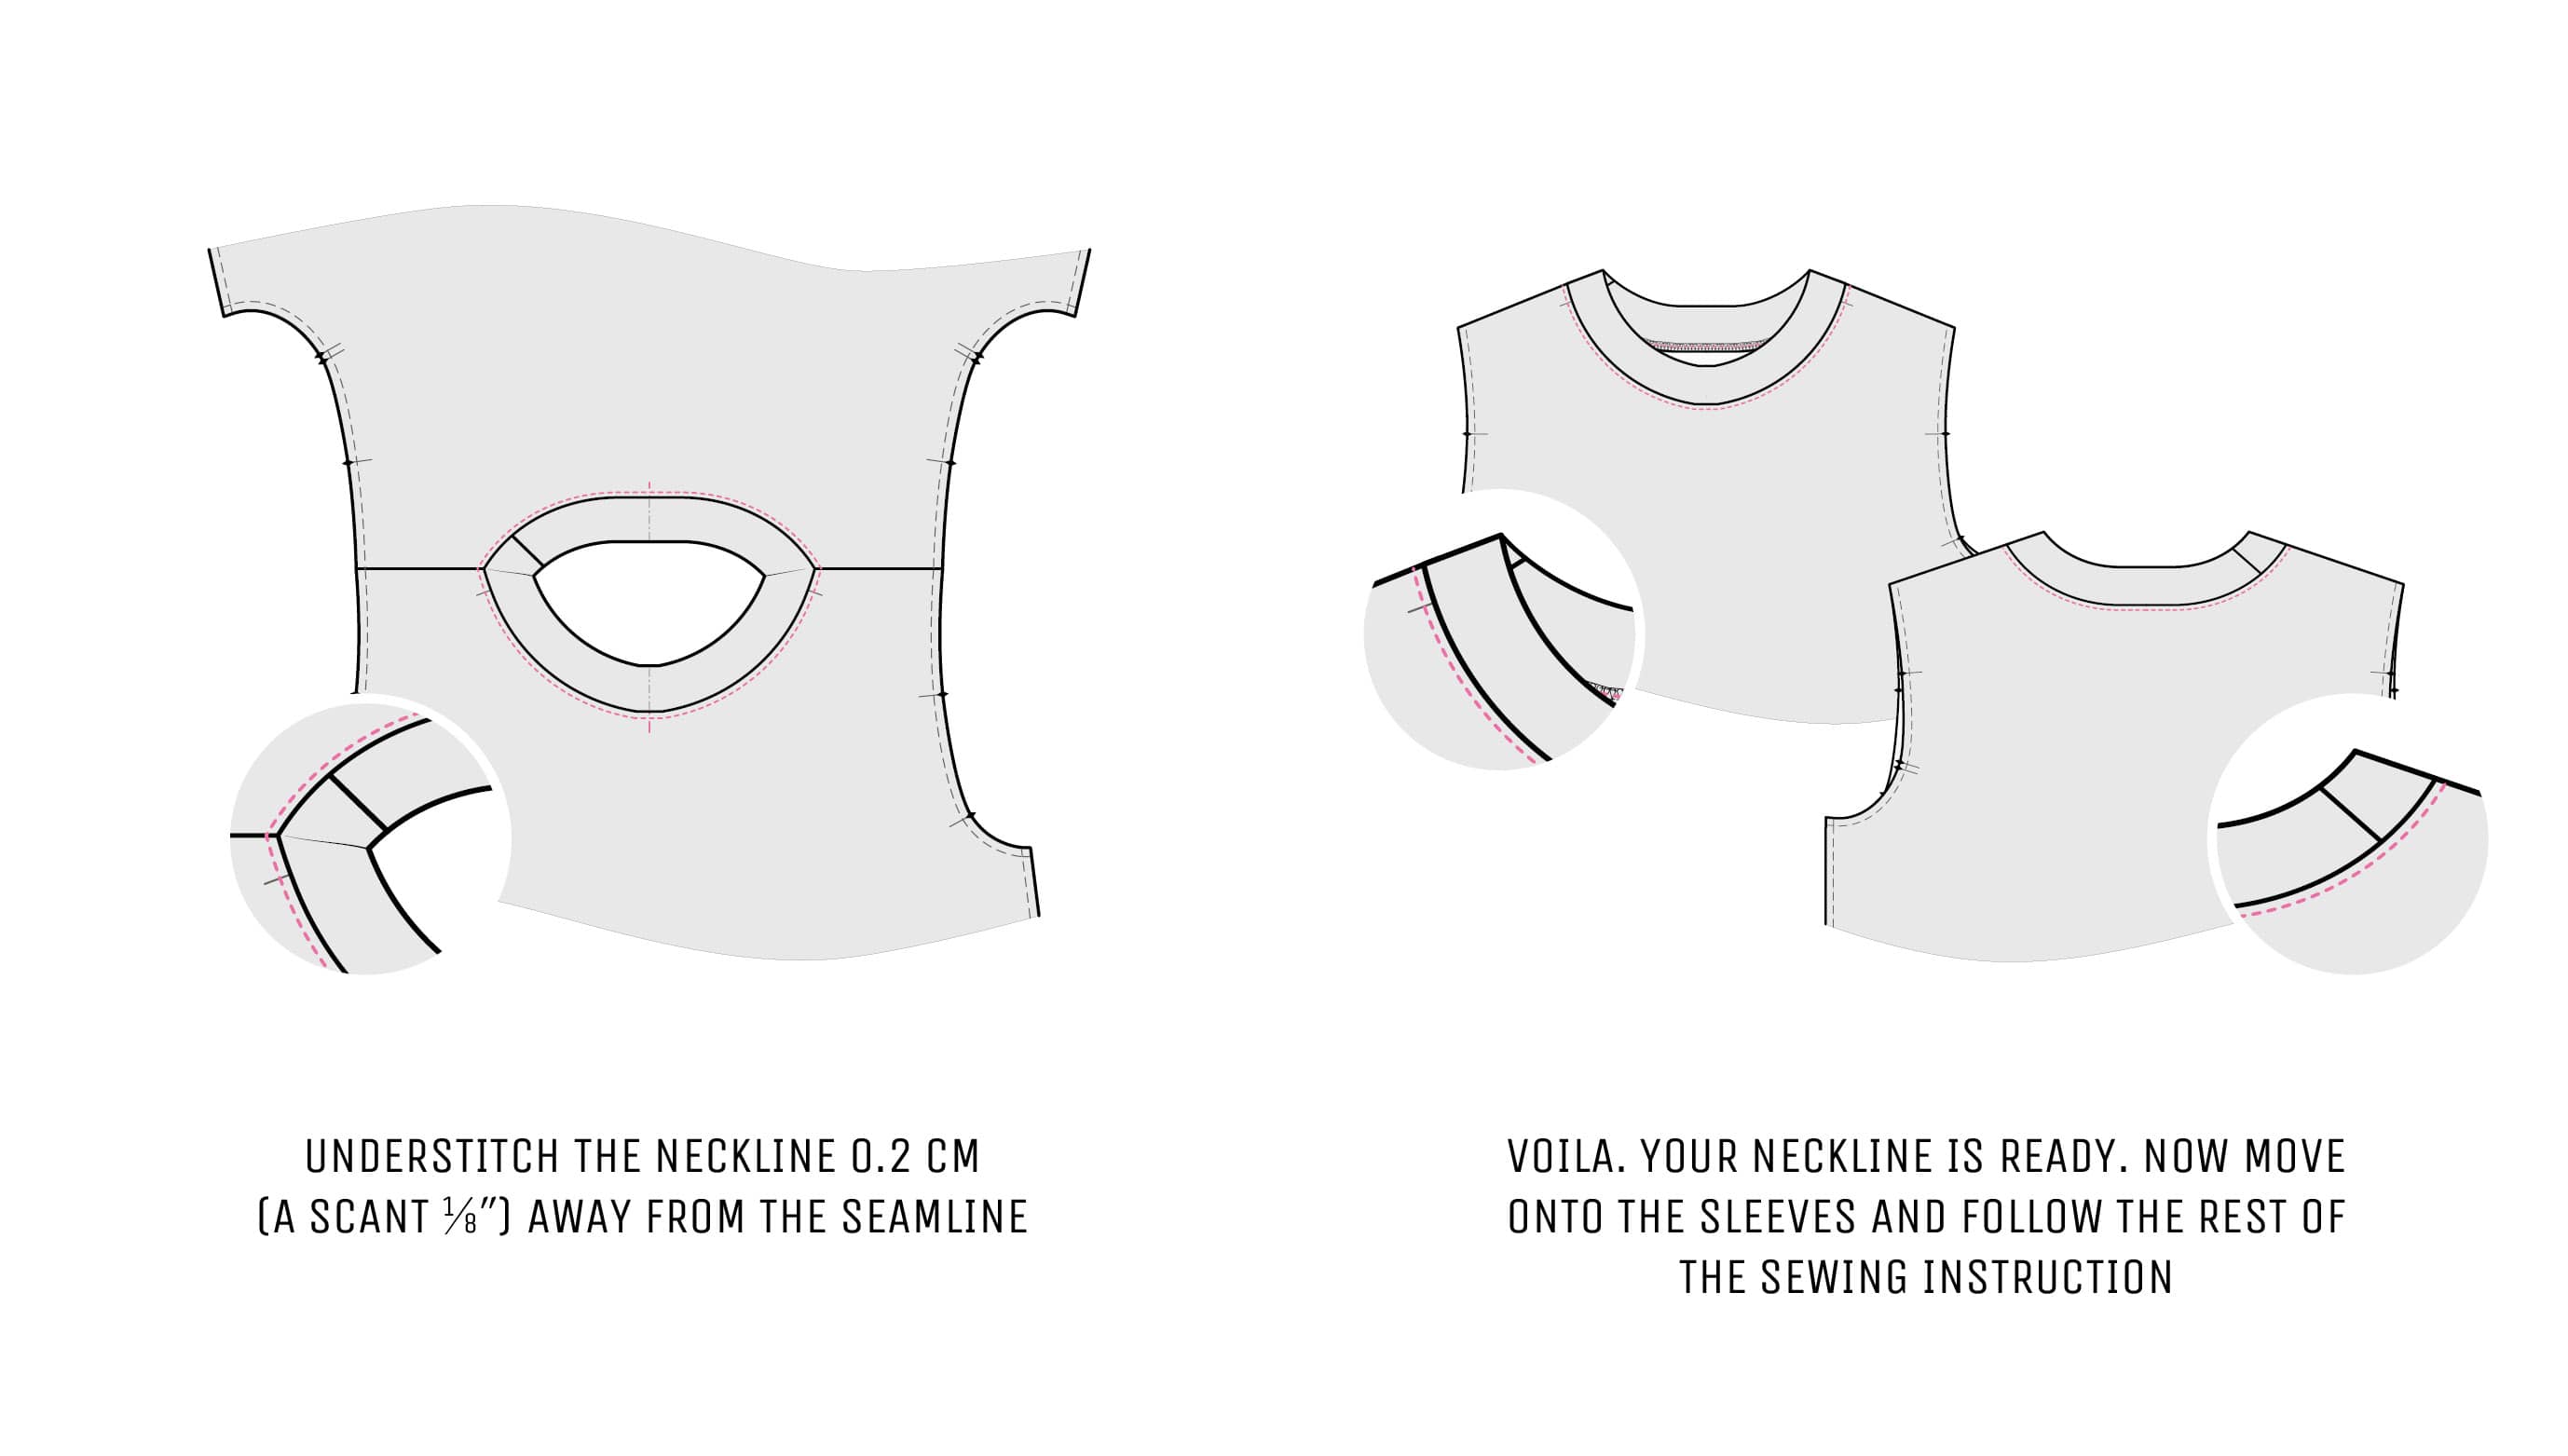
Voila. Your T-shirt has a neckline band that can beat manufactured ones. Now move onto the sleeves and follow the rest of the sewing instruction.
xoxo
Kaia

 My Etsy Store